GitHub Copilot Guide
May 28, 2024GitHub Copilot is an AI-powered pair programmer. It allows developers to write code more efficiently by providing relevant suggestions and completions based on the current context and desired functionality. Copilot leverages machine learning models trained on extensive open-source code repositories. It generates real-time code snippets, function definitions, and even entire lines of code directly within popular development environments like Visual Studio Code. By analyzing the code being written and understanding the developer's intent, Copilot aims to boost productivity, reduce errors, and facilitate learning of new programming patterns and techniques. Although there are concerns around code ownership, licensing, and potential biases in the generated code, tools like GitHub Copilot show potential to augment human creativity and productivity in software development.
To begin using GitHub Copilot in Visual Studio Code, follow these instructions.
- GitHub Copilot Subscription
- GitHub Copilot Installation
- GitHub Copilot Configuration
- GitHub Copilot Usage
You will need a subscription to use GitHub Copilot. One of the benefits you receive in this boot camp is 12 months of access to the GitHub Student Developer Pack. By now, you should have received an email with a link to the Student Developer Pack, which includes a subscription to GitHub Copilot.
Important Ensure that you've accepted the GitHub Student Developer Pack invitation before proceeding.
Important As you start working with GitHub Copilot, it's vitally important to keep in perspective its role as a tool that can assist us as developers. It does NOT replace writing code or solving problems. Using Copilot to help us write code has a benefit, but only if we understand and validate the code that it generates.
The following installation images were captured on a Windows machine. The installation process is the same for Mac, but the installer will look slightly different.
To install GitHub Copilot, visit the GitHub Copilot extension page. Click the Install button, as shown in the following image:

In the dialog that opens, click the Continue button, as shown in the following image:

In the Open Visual Studio Code dialog, click the Open Visual Studio Code button as shown in the following image:

Visual Studio Code will open and display a tab for the GitHub Copilot extension. When the tab opens, click Install, as shown in the following image:

If you have not authorized Visual Studio Code in your GitHub account, you will be prompted to sign in to GitHub in Visual Studio Code and authorize GitHub Copilot.
A browser page will open to request you to authorize GitHub Copilot. Click Authorize Visual Studio Code.
This will return you to Visual Studio Code. In the Visual Studio Code dialog, click Open to confirm.
Congratulations, GitHub Copilot is now ready for you to use in Visual Studio Code!
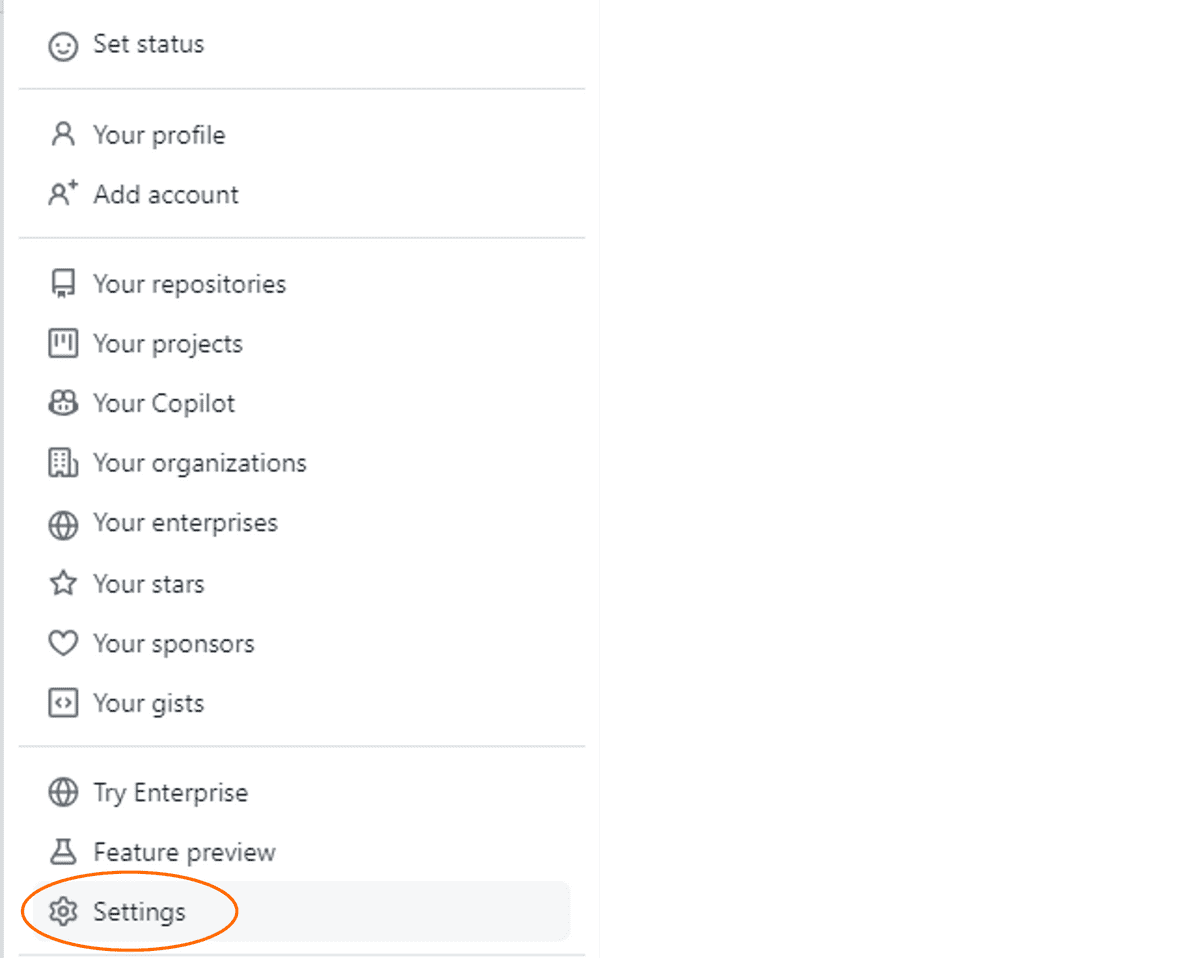
To configure GitHub Copilot, visit the GitHub main page. Log in to your GitHub profile, click your profile picture, and select Settings, as shown in the following image:

On the Settings page, locate the "Code, planning, and automation" section and click on the "Copilot" option.

In the "Policies" section, locate the "Suggestions matching public code" and select the "Blocked" option from the available choices, as shown in the following image:

Let's try an example to get started using GitHub Copilot.
Create a new file named style.css, enter the following css, and save the file.
.card {padding: 10px;width: 250px;text-align: center;border-style: solid;border-width: 1px;}.card header {padding: 20px;background: #13293d;color: #fff;}.card img {width: 100%;}
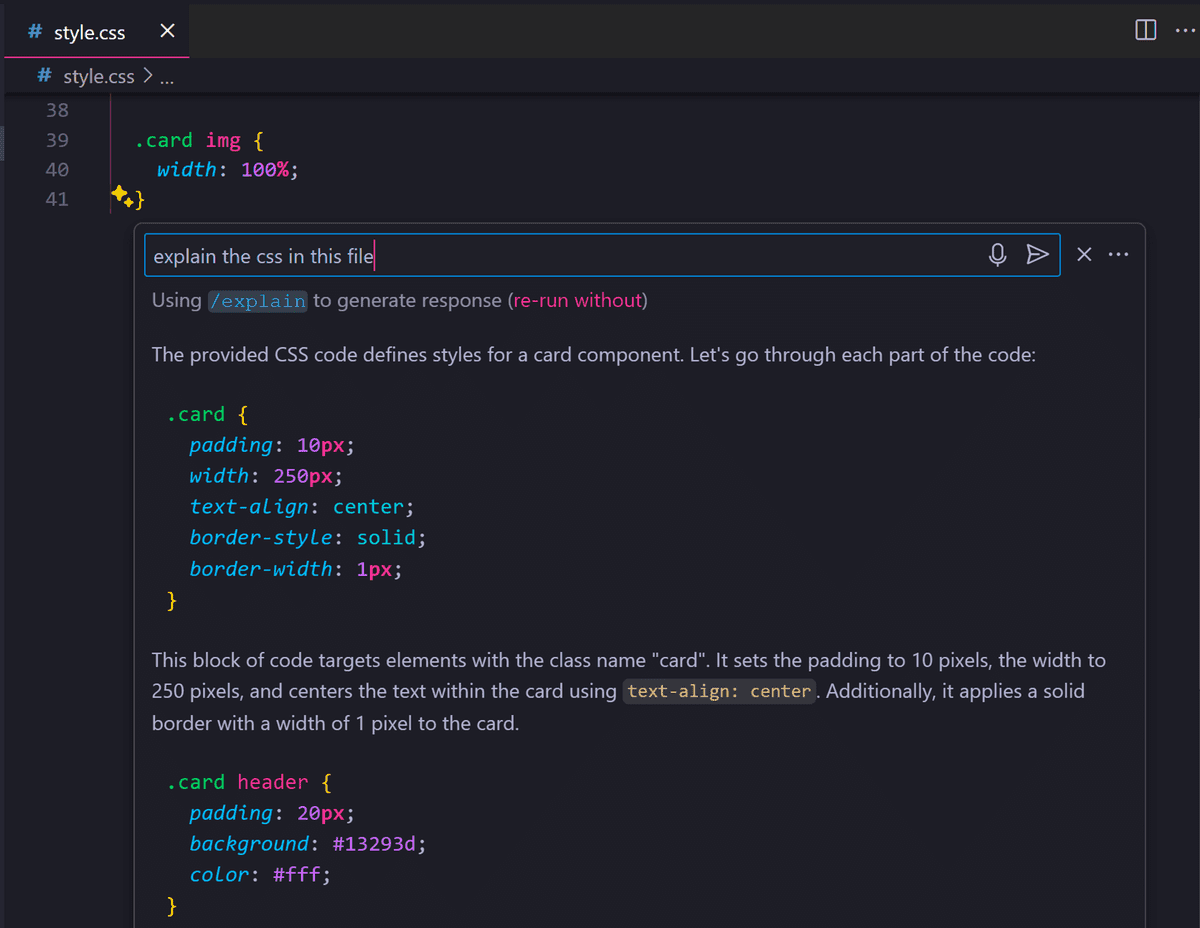
Open GitHub Copilot Chat by pressing Ctrl + I on Windows or Cmd + I on Mac.

In GitHub Copilot Chat, type the following text and press Enter to make your request:
explain the css in this file

GitHub Copilot will generate an explanation of the CSS in the file. You can continue to ask more questions and ask for Copilot for further explanation.
This is just one possible way out of many to use Copilot to enhance your productivity and learning. Welcome to the future!
This page was updated 2 months ago
© 2022 edX Boot Camps LLC. Confidential and Proprietary. All Rights Reserved.
Category: github
Tagged under: ai, artificial intelligence, github copilot, installation, guide,
All Posts
- OpenAI Account Setup Guide
- NodeJS Installation Guide
- PostgreSQL Reference Guide
- GitHub Copilot Guide
- PostgreSQL Installation Guide
- Deploy with Render and PostgreSQL
- API Resources
- Render Deployment Guide
- Deploying a MERN Stack Application to Render
- Deploy with Render and MongoDB Atlas
- The Science and Research Behind Our Unconventional Educational Approach
- What Makes Up a Web Development Project?
- Localhost Loopback Issues Troubleshooting Guide
- Video Submission Guide
- A Growth Mindset for Life
- Web Literacy
- Developer Resources
- Introduction to Computer Structure and Organization
- MySQL Installation Guide
- HTML Cheatsheet
- Advanced Computer Skills
- Introduction to Computer Skills
- How to Use API Keys
- How to Install MongoDB
- MySQL Reference Guide
- Heroku Deployment Guide
- Getting Started with Git
- Using the GraphQL Playground in a MERN application
- Professional README Guide
- Regular Expression Tutorial
- How to Install the Heroku CLI
- How to Install NodeJS
- Deploy with Heroku and MySQL
- Deploy with Heroku and MongoDB Atlas
- Set Up MongoDB Atlas