Deploy with Render and PostgreSQL
May 28, 2024You've already deployed a Node.js application to Render, but what about deploying an application that needs to connect to a database?
In development, we get to use our local PostgreSQL servers for storing our application's data, but that won't work with a deployed application, since it won't have access to our machine. In this case, we need to do slightly more configuration on Render to deploy our app.
In this guide, we'll walk through the steps we need to take to deploy an application backed by a PostgreSQL database to Render.
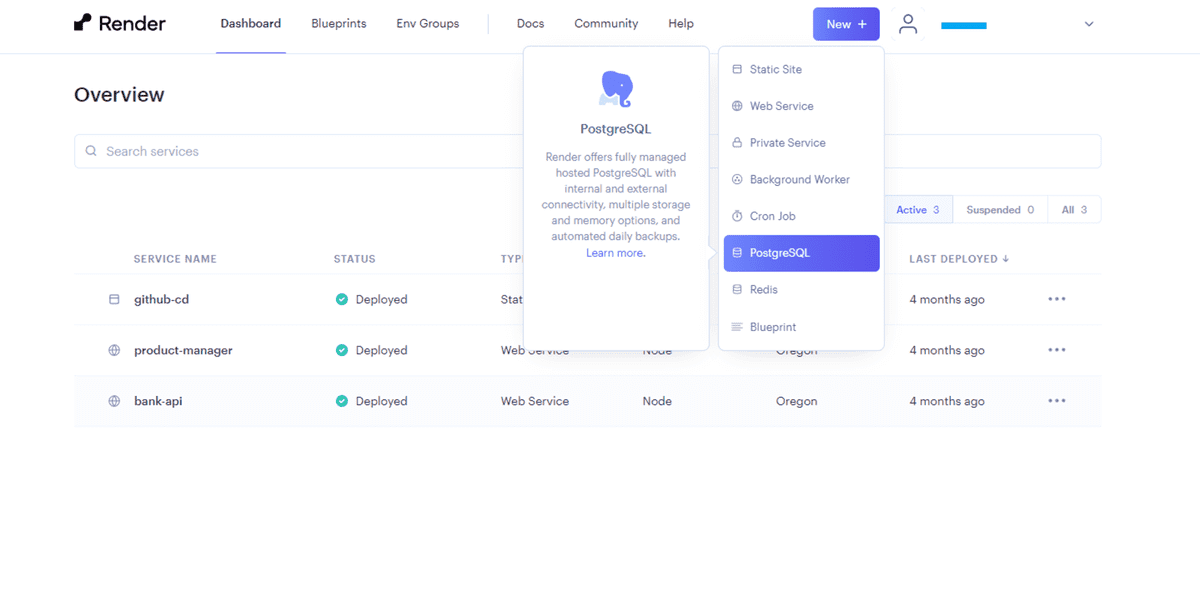
While logged in to Render, Click the "New" button from the menu at the top, and select PostgreSQL from the dropdown menu, as shown in the following image:
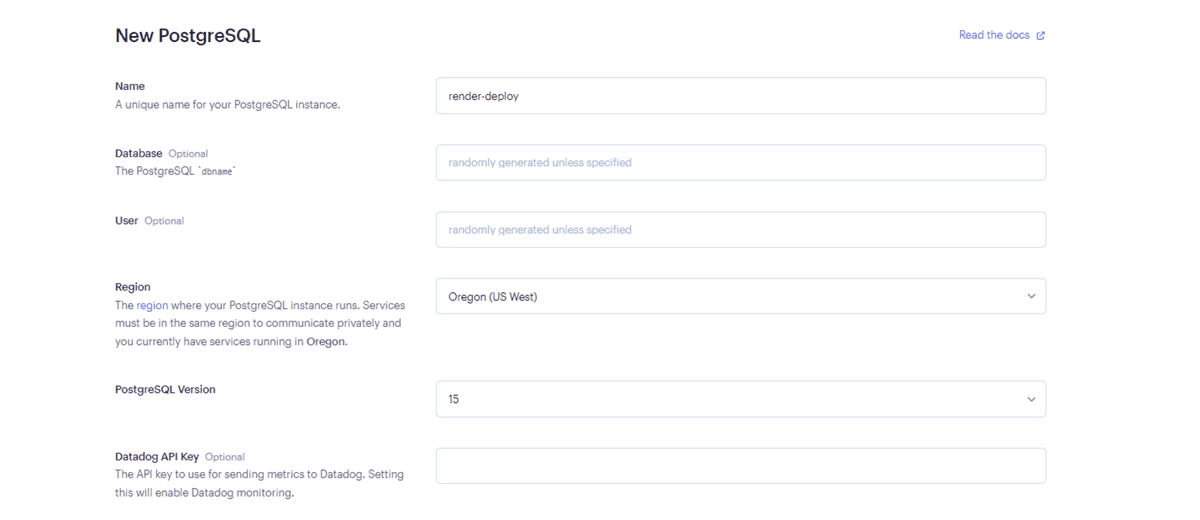
On the New PostgreSQL creation page, give your database a name. Feel free to name this whatever you like, as you can change this later. If you are using the free tier of Render, you can only have one PostgreSQL instance at a time, so it would be preferable to give this a general name if it will be used for multiple projects. Feel free to leave "Database" and "User" blank, and these will be generated for you. Make a note of the region that your PostgreSQL instance runs in, because you will want your region for your Render Web Service to match. Keep the "PostgreSQL Version" field as the default, and leave the Datadog API Key field blank. When you are complete with the form, it should look similar to the following:
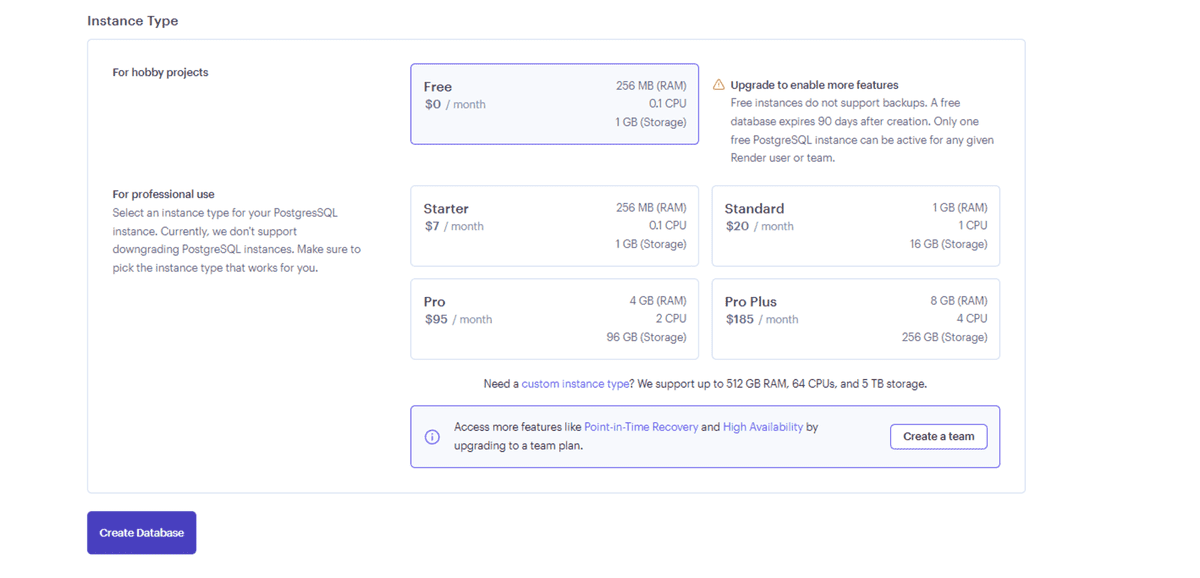
Before clicking "Create Database", make sure that you have the "Free" tier selected so that you do not incur charges for the database. Note that for the free tier, your database will expire after 90 days, and you can only have one PostgreSQL instance at a time on the free tier. Click the "Create Database" button shown in the following:
Once the database has been created, scroll down to the "Connections" section and click the button to copy the "Internal Database URL" to clipboard, like so:
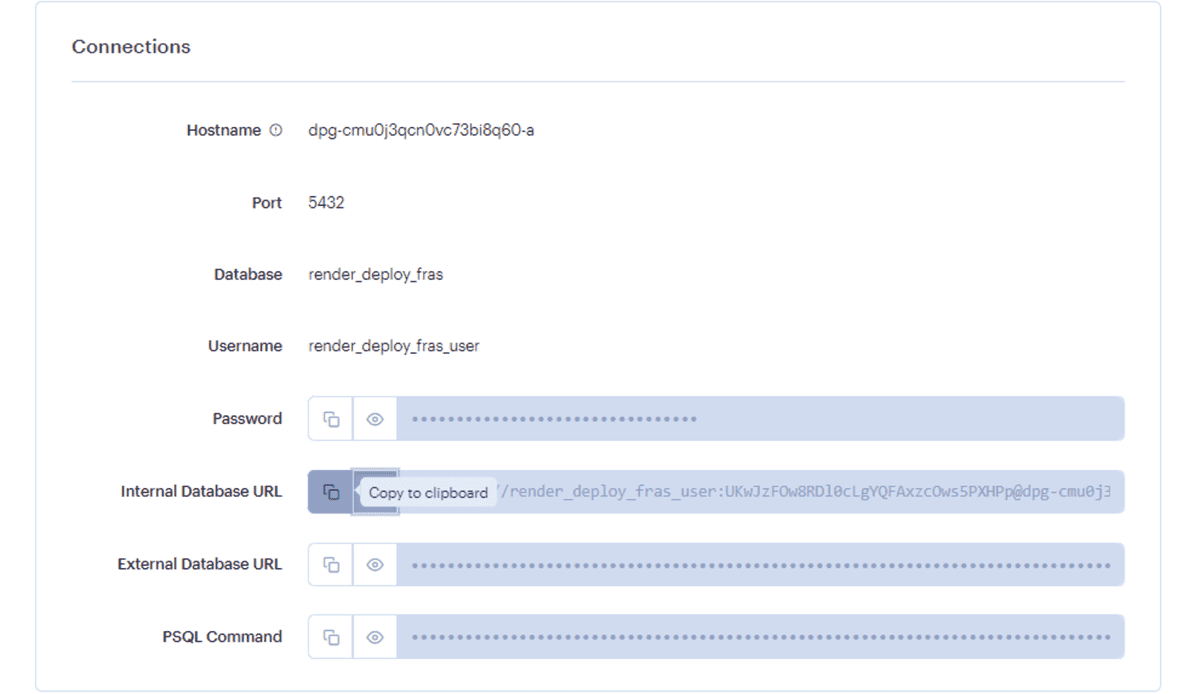
We will use this copied value in the next step when we set up our web service with Render.
From the top bar in Render, click the "New" button and select "Web Service" from the dropdown menu, as shown in the following image:
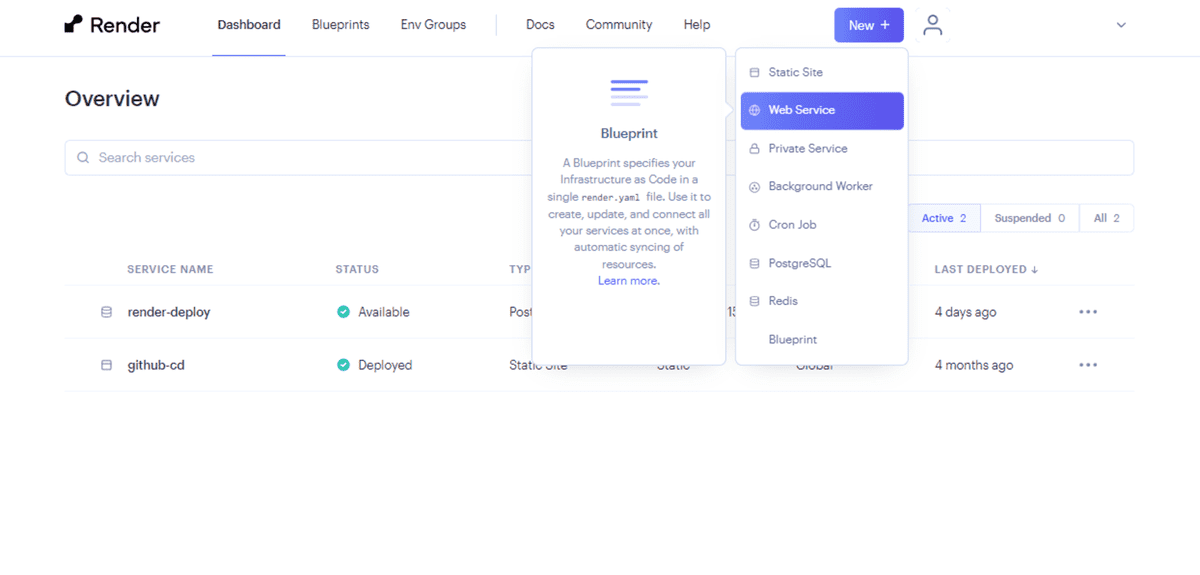
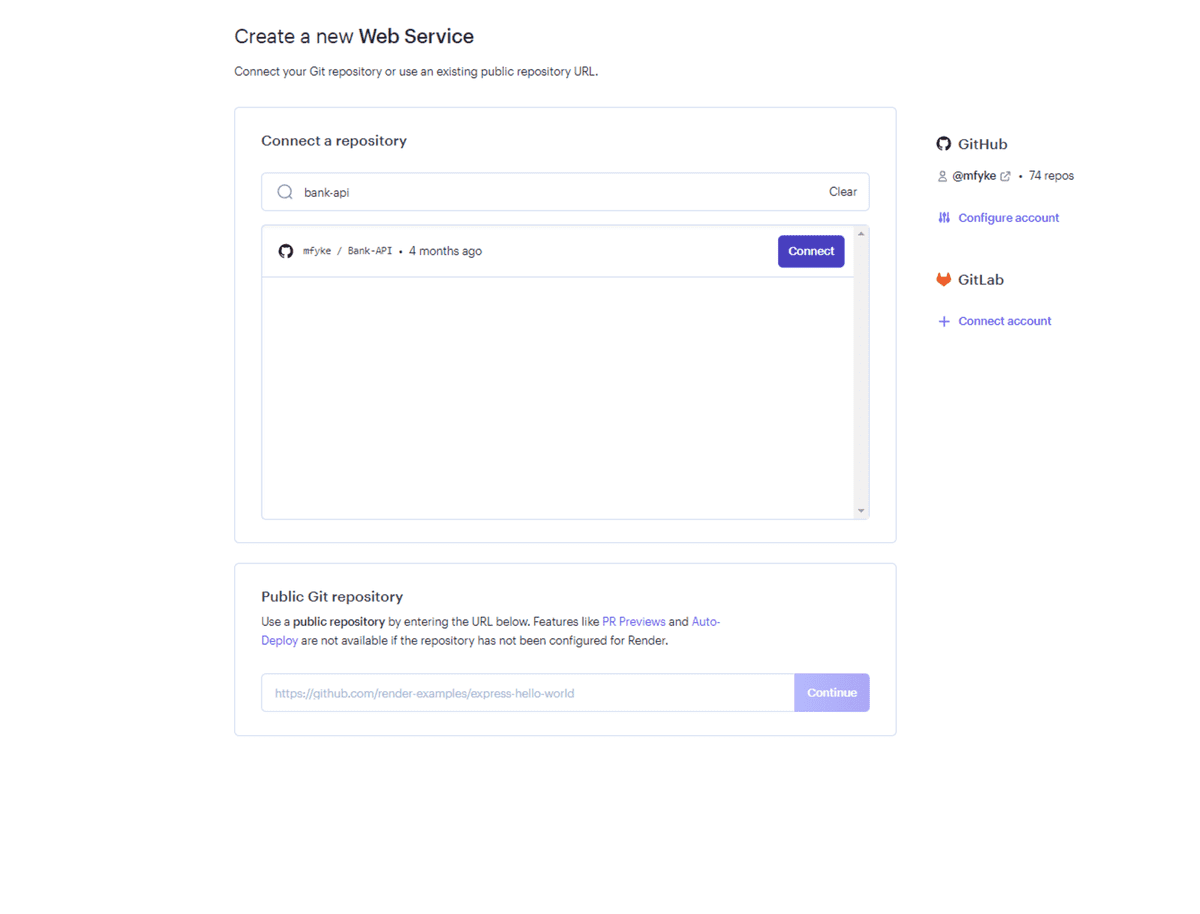
Next, select to deploy from existing repository. You should already have your GitHub account connected to your Render account. If you do not, click the "Connect account" button on the right of the screen under the GitHub logo and sign in to connect your account. Once you have your GitHub account connected, find the repository you would like to deploy in the list under "Connect a repository", and click "Connect", as shown in the following:
On the next page, give a unique name for your web service, this name will correspond with the default URL that is created when you deploy the web service. Other than the name, you can leave the other options in the first section of the form as default, except in the case where you may need to change your "Start Command". If your web service is not started using the command node server.js, update this start command with the correct file name. When the first section is complete, it should look like the following:
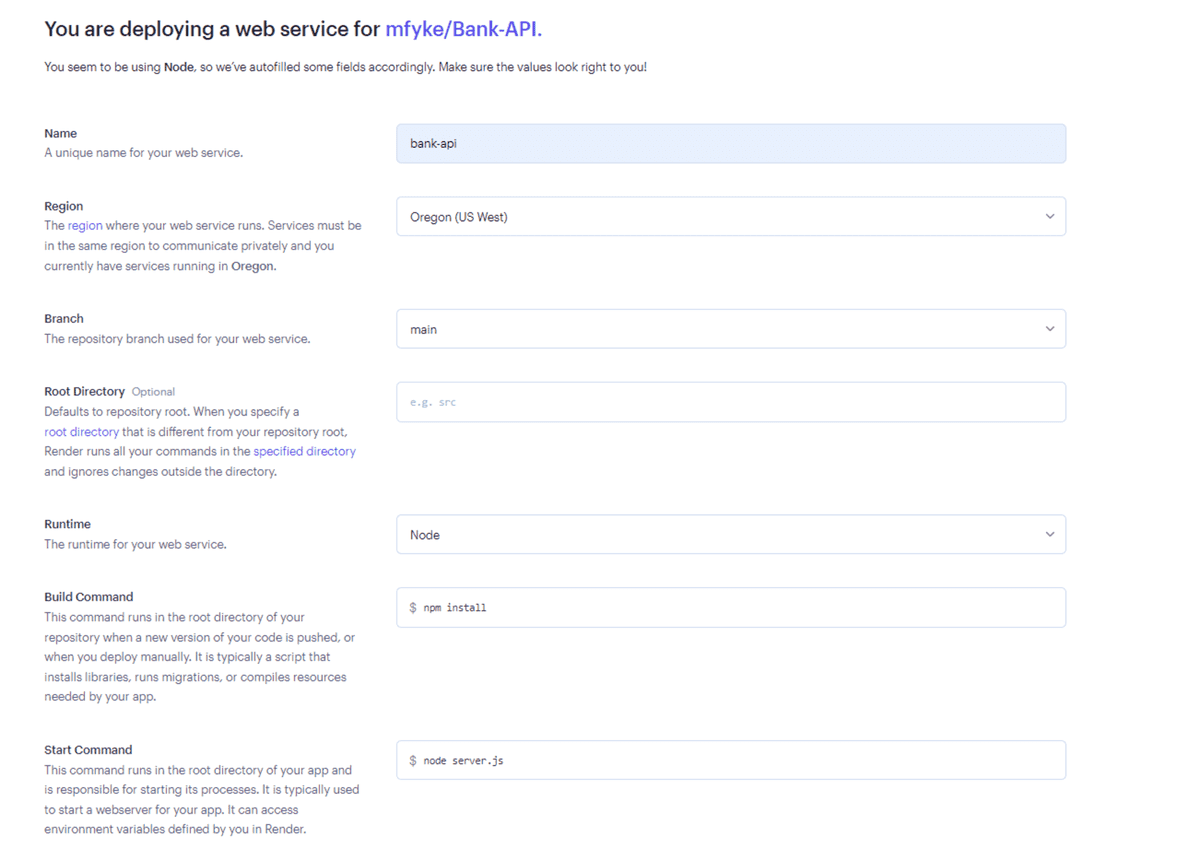
Note: Make sure that you have the same "Region" selected as the "Region" you selected for your PostgreSQL instance. If you left the default selected for both, they should match. This is required in order to use the private url that we copied earlier.
In the next portion of the form, make sure to select the "Free" instance type. In the "Environment Variables" section, create a new environment variable with the name DB_URL and the value the PostgreSQL URL that you copied in the previous section of this guide. Click "Create Web Service", as shown in the following:
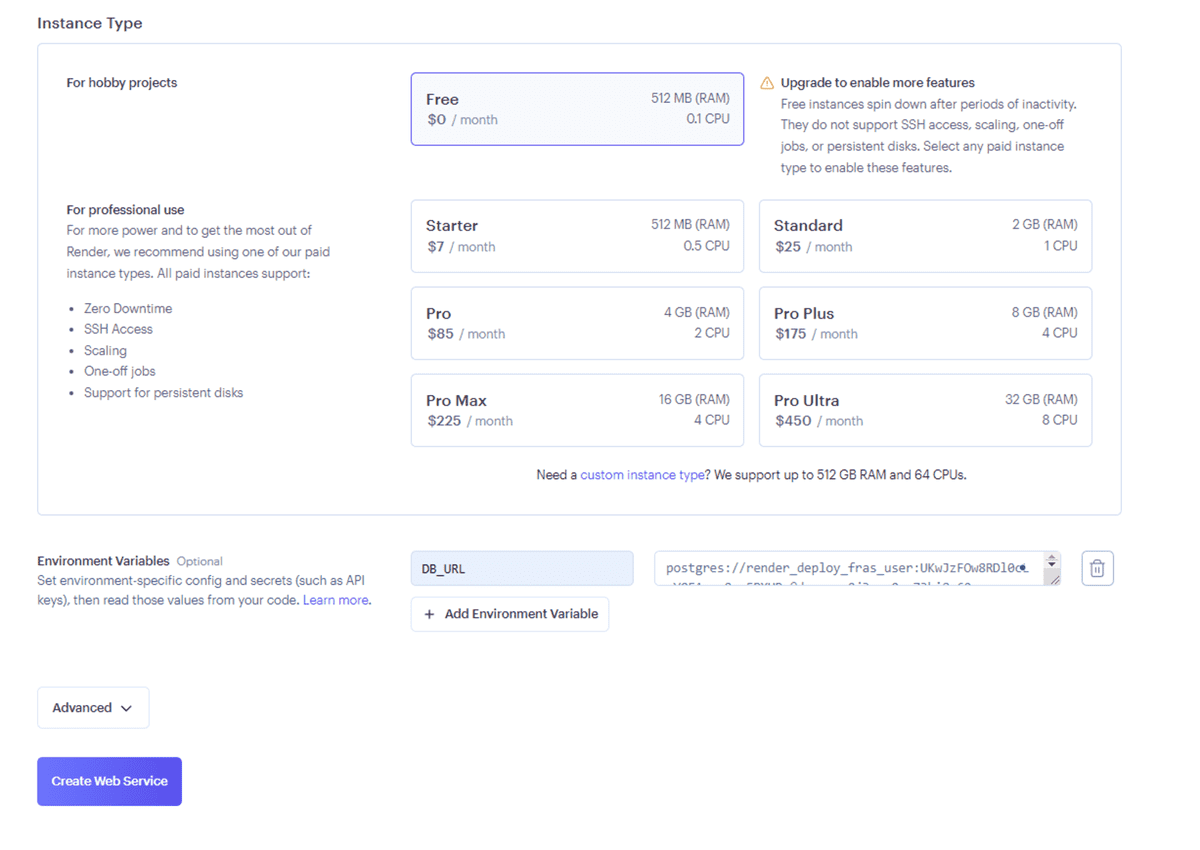
At this stage, you should have a failing deploy as we will need to configure our connection in the next section.
First, to make your application use the port variable provided by Render, add the following line in server.js:
const PORT = process.env.PORT || 3001;
This makes the app use the value of the PORT variable provided in the Render environment variables. Having a dynamic port number is important, because it's very unlikely that the port number you hardcode (3001, for example) would be the port Render runs your app on in production.
There's another hardcoded value in the app that Render won't appreciate. Open your config/connection.js file and review the current setup, as shown in the settings below:
const sequelize = new Sequelize(process.env.DB_NAME,process.env.DB_USER,process.env.DB_PW,{host: 'localhost',dialect: 'postgres'},);
As of now, this will only work with your local database. Could you continue using your local database even on Render? Well, yes, but then you'd have to make your ports public (probably not a good idea) and always leave your computer on.
Instead, we need to make use of the environment variable that we defined in the previous step, so that we can connect to our PostgreSQL instance hosted on Render. Open the config/connections.js file and update it to look like the following code:
let sequelize;if (process.env.DB_URL) {sequelize = new Sequelize(process.env.DB_URL);} else {sequelize = new Sequelize(process.env.DB_NAME,process.env.DB_USER,process.env.DB_PW,{host: 'localhost',dialect: 'postgres',},);}
When the app is deployed, it will have access to Render's DB_URL variable and use that value to connect. Otherwise, it will continue using the localhost configuration.
Let's try it out! Run the following commands from the terminal to update the app:
git add -Agit commit -m "connect to postgresql"git push origin main
After pushing to main, since your app is connected via GitHub, Render will trigger an automatic redeploy.
If your app doesn't have a front end, there won't be much to see in the browser. You can still test the API endpoints with Insomnia Core, though. Simply replace http://localhost:3001 with the name of your Render app. For example: https://bank-api-38sq.onrender.com/api/accounts.
Of course, all of your GET requests will return empty data sets, because you're connected to a brand new database. You'll need to make a few POST requests first to fill up the PostgreSQL database.
This page was updated 2 months ago
© 2022 edX Boot Camps LLC. Confidential and Proprietary. All Rights Reserved.
Category: render
Tagged under: render, postgresql, sequelize, deployment, guide,
All Posts
- OpenAI Account Setup Guide
- NodeJS Installation Guide
- PostgreSQL Reference Guide
- GitHub Copilot Guide
- PostgreSQL Installation Guide
- Deploy with Render and PostgreSQL
- API Resources
- Render Deployment Guide
- Deploying a MERN Stack Application to Render
- Deploy with Render and MongoDB Atlas
- The Science and Research Behind Our Unconventional Educational Approach
- What Makes Up a Web Development Project?
- Localhost Loopback Issues Troubleshooting Guide
- Video Submission Guide
- A Growth Mindset for Life
- Web Literacy
- Developer Resources
- Introduction to Computer Structure and Organization
- MySQL Installation Guide
- HTML Cheatsheet
- Advanced Computer Skills
- Introduction to Computer Skills
- How to Use API Keys
- How to Install MongoDB
- MySQL Reference Guide
- Heroku Deployment Guide
- Getting Started with Git
- Using the GraphQL Playground in a MERN application
- Professional README Guide
- Regular Expression Tutorial
- How to Install the Heroku CLI
- How to Install NodeJS
- Deploy with Heroku and MySQL
- Deploy with Heroku and MongoDB Atlas
- Set Up MongoDB Atlas