Set Up MongoDB Atlas
February 06, 2024Disponible en español
In this guide, we'll go through the steps required to create your account and initial cluster with MongoDB Atlas.
MongoDB Atlas is a cloud-based database service that is created and maintained by MongoDB. It works with hosting services such as AWS, Azure, and Google Cloud to help users provision, maintain, and secure new databases for their applications.
We'll use its free service tier to host MongoDB databases for our production-ready apps when we deploy them. Learn more about it at the MongoDB Atlas website.
To get started, you'll need a MongoDB Atlas account.
- To begin the sign-up process, navigate to the MongoDB Atlas sign-up page, which is shown in the following image:
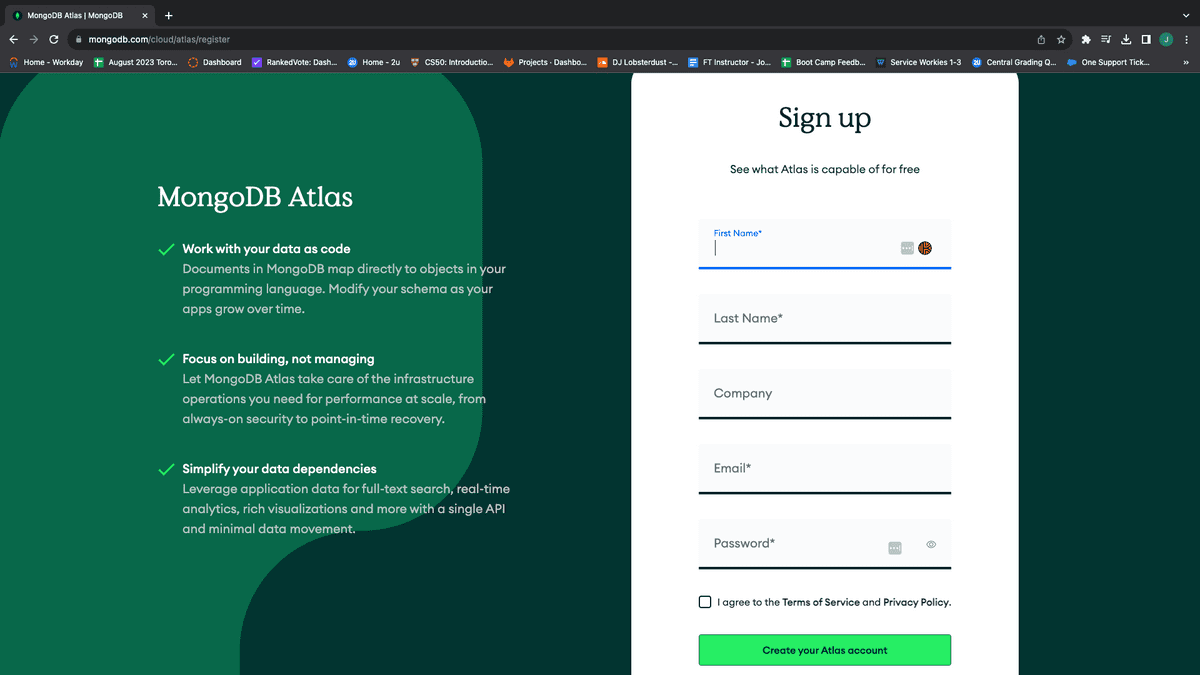
Fill in the required fields.
When you're done, click "Create your Atlas account".
Next you will be sent an email verification. Verify your email by clicking the "Verify Email" button on that email as shown in the image below:
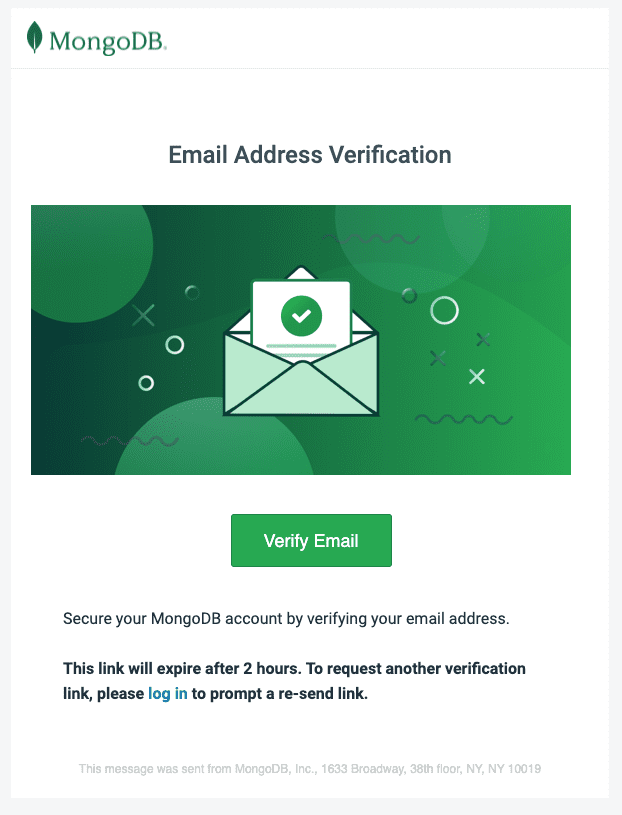
- After verifying your email, head back to the Mongo Login page and login using your credentials.
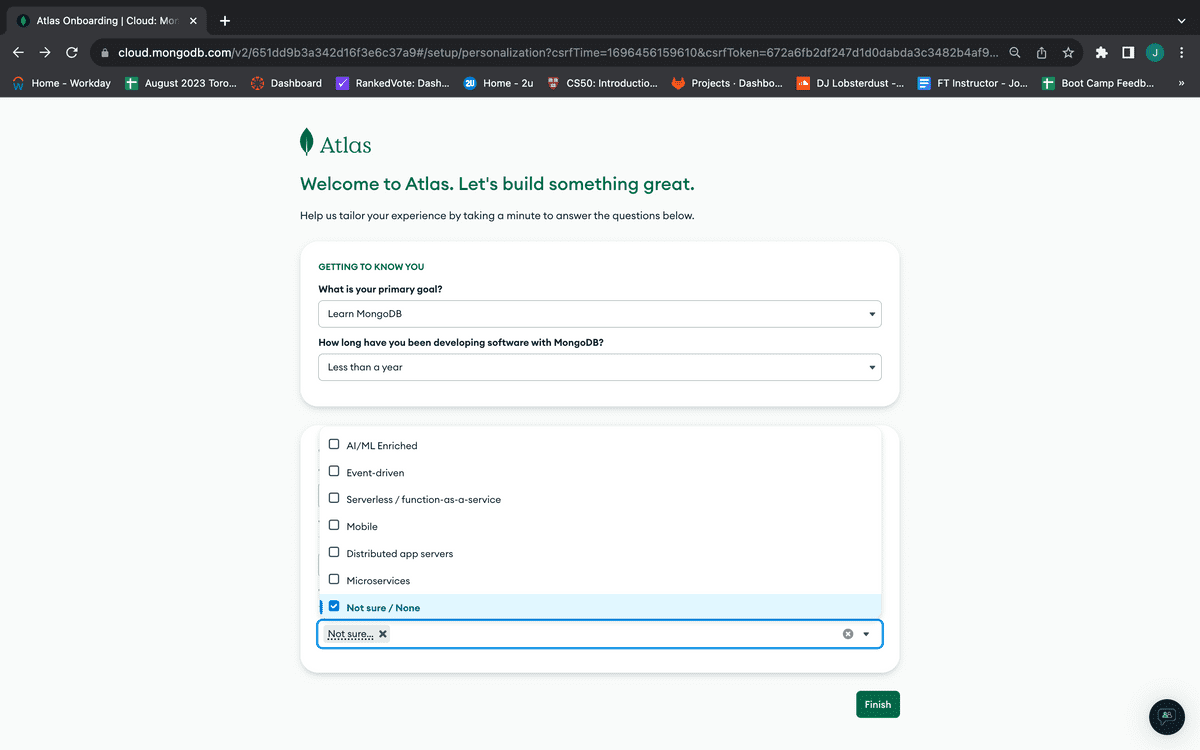
Upon logging in for the first time, you will be presented with a "Welcome to Atlas!" page.
For "What is your goal primary goal?", select "Learn MongoDB".
For "How long have you been developing software with MongoDB??", select "Less than a year".
Select "JavaScript" as your primary language.
For "What kind(s) of data will your project use?" and "Will your application include any of the following architectural models?", Select "Not sure/None" .
Your form should look like the image below:
Upon completing the form you will be presented with a your "Overview" page.
- To create a cloud database for deployment, click the "+ Create" button.
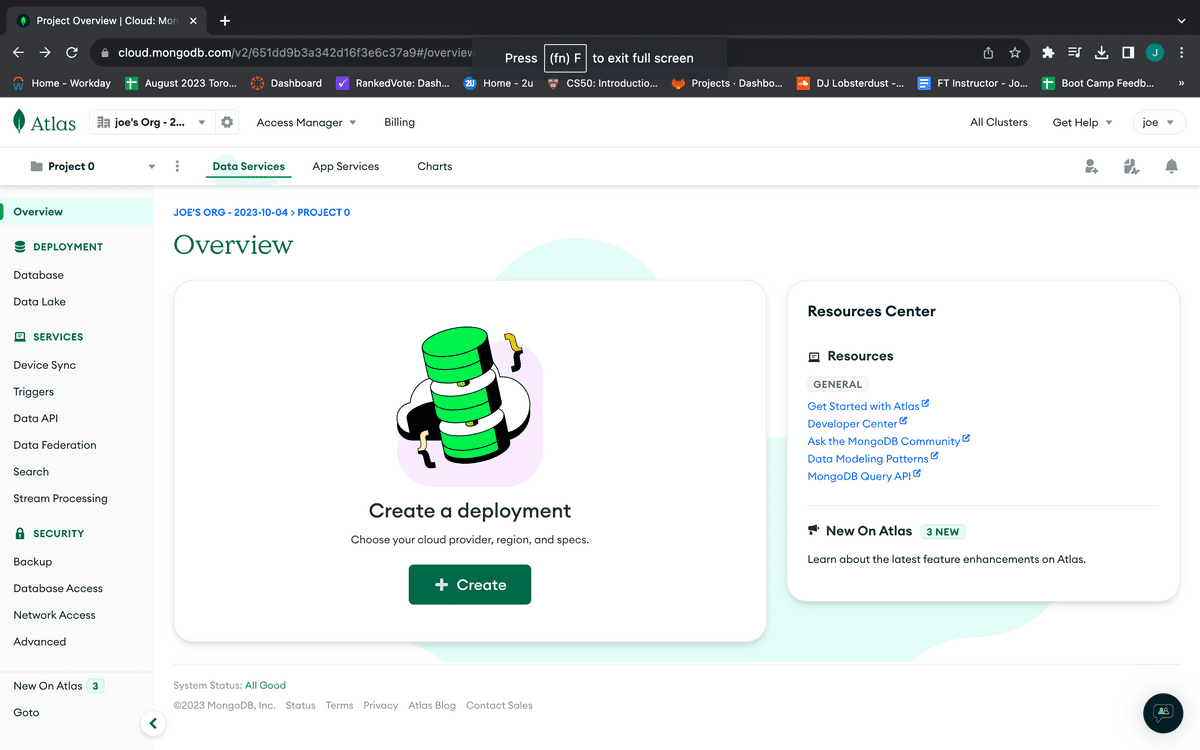
- You'll be taken to the "Deploy your database" page, as shown in the following image:
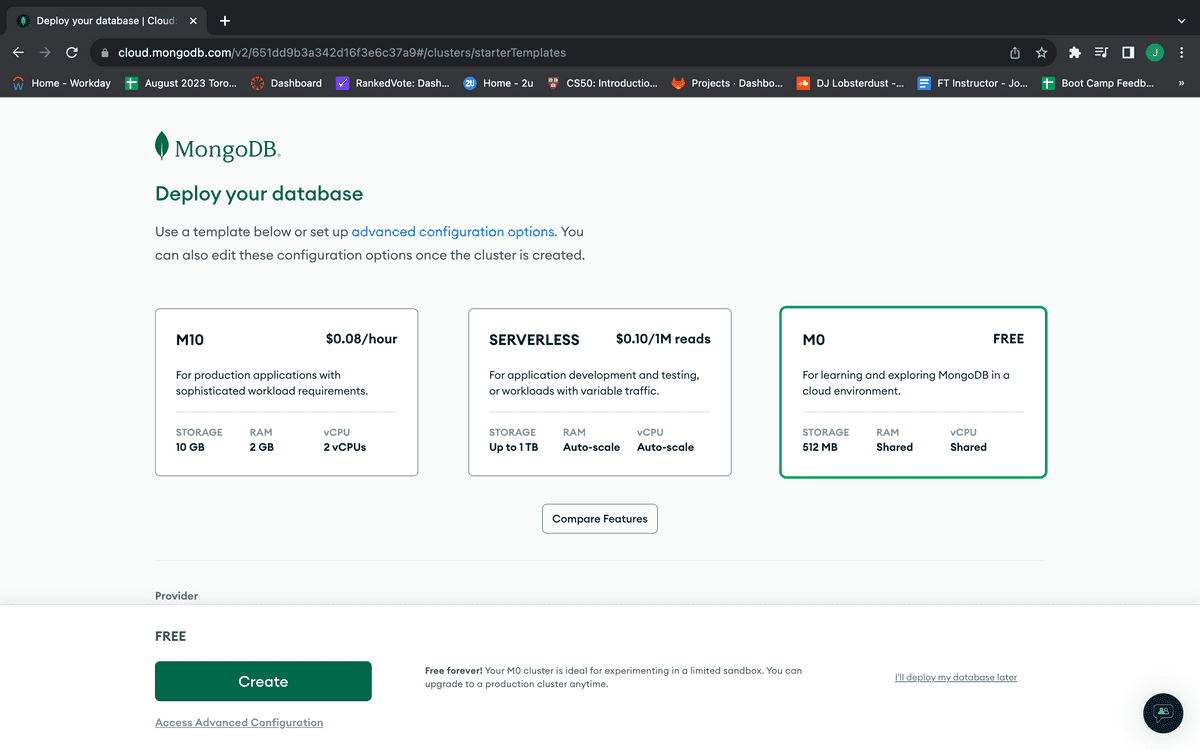
Select the free "M0 FREE" plan.
Select "AWS" as the provider. For the region, select the region that is closest to you. You can accept the default cluster name provided. If after selecting your provider and nearest region your screen resembles the following image, you can click the green "Create" button:
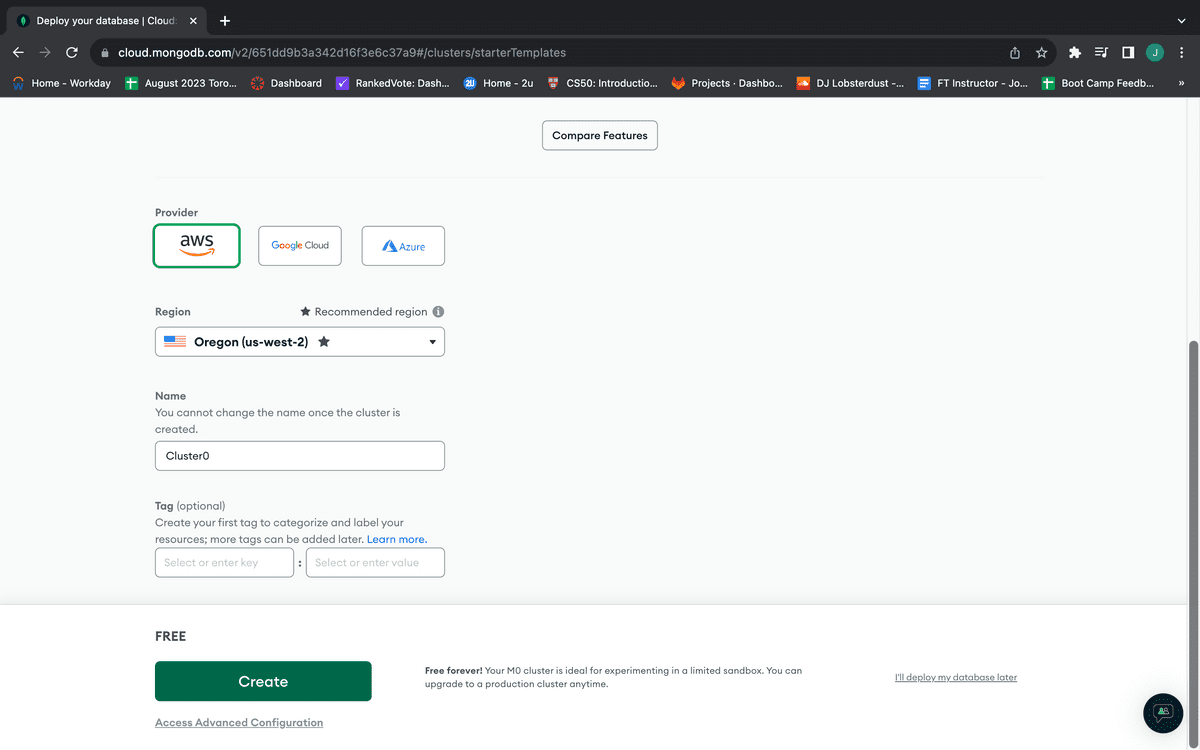
Because this is the first time you've seen this dashboard, you'll be taken directly to the "Security Quickstart". Instead of going through the quickstart, we will go through the security settings manually.
To add a new database user, follow these steps:
On the left-hand navigation menu, under Security, select the "Database Access" link.
From there, click the "Add New Database User" button. The following image shows the resulting modal with the options you'll need to select:
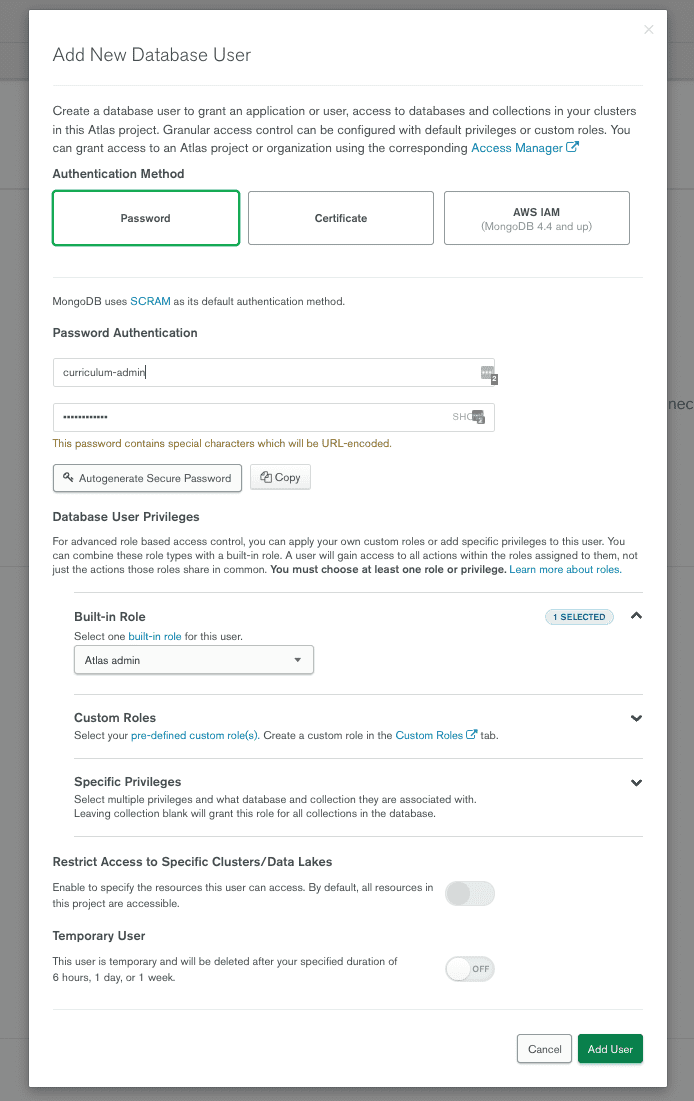
- To fill out the form, follow these steps:
For "Authentication Method", choose Password.
Under "Password Authentication", create a username and password that you'll remember.
Under "Database User Privileges", select "Atlas admin".
Leave any remaining options as default.
IMPORTANT: Do not enable "Temporary User" unless you want to make a new user every so often.
When you're done, click "Add User".
You'll need allow your IP address. The following image shows the various parts of this step highlighted:
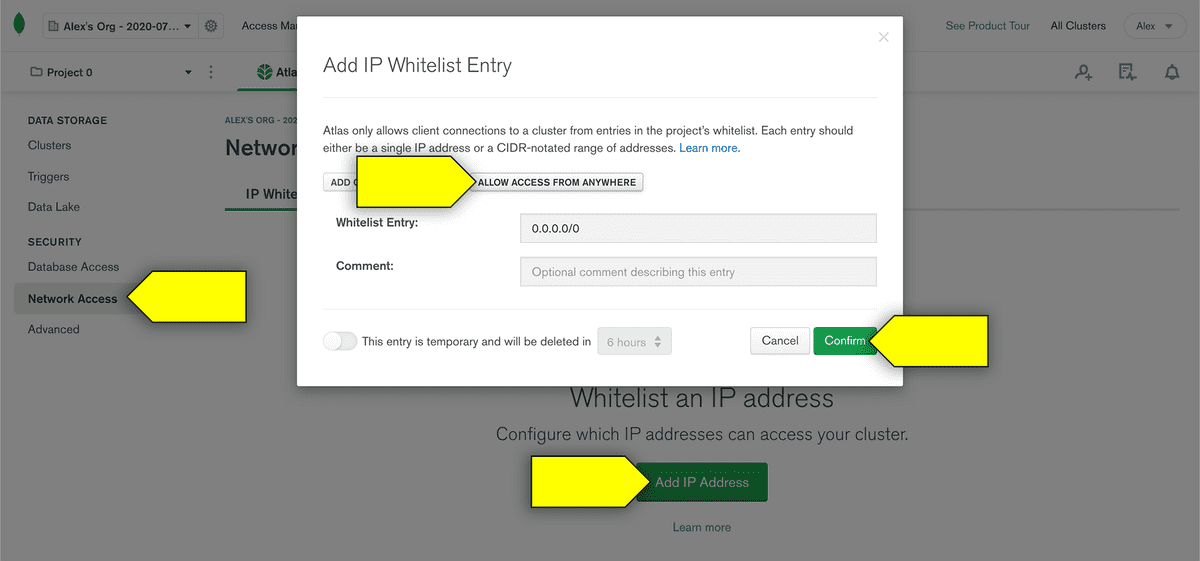
To allow your IP address, follow these steps:
On the left-hand navigation menu, under Security, click the "Network Access" link.
Click the "Add IP Address" button. The "Add IP Whitelist Entry" modal will appear.
To make your database accessible from anywhere, click "Allow Access From Anywhere". This will set the Whitelist Entry value to "0.0.0.0/0".
Click Confirm.
That's it for now! You don't need to worry about adding sample data or connecting just yet.
Now that your accounts are all set up, you can move on to creating a production-ready database for deployment.
This page was updated 6 months ago
© 2022 edX Boot Camps LLC. Confidential and Proprietary. All Rights Reserved.
Category: MongoDB
Tagged under: mongodb, mongodb atlas, cloud,
All Posts
- OpenAI Account Setup Guide
- NodeJS Installation Guide
- PostgreSQL Reference Guide
- GitHub Copilot Guide
- PostgreSQL Installation Guide
- Deploy with Render and PostgreSQL
- API Resources
- Render Deployment Guide
- Deploying a MERN Stack Application to Render
- Deploy with Render and MongoDB Atlas
- The Science and Research Behind Our Unconventional Educational Approach
- What Makes Up a Web Development Project?
- Localhost Loopback Issues Troubleshooting Guide
- Video Submission Guide
- A Growth Mindset for Life
- Web Literacy
- Developer Resources
- Introduction to Computer Structure and Organization
- MySQL Installation Guide
- HTML Cheatsheet
- Advanced Computer Skills
- Introduction to Computer Skills
- How to Use API Keys
- How to Install MongoDB
- MySQL Reference Guide
- Heroku Deployment Guide
- Getting Started with Git
- Using the GraphQL Playground in a MERN application
- Professional README Guide
- Regular Expression Tutorial
- How to Install the Heroku CLI
- How to Install NodeJS
- Deploy with Heroku and MySQL
- Deploy with Heroku and MongoDB Atlas
- Set Up MongoDB Atlas