Deploy with Heroku and MySQL
February 06, 2024Disponible en español
You've already deployed a Node.js application to Heroku using the Heroku CLI, but what about deploying an application that needs to connect to a database?
In development, we get to use our local SQL servers for storing our application's data, but that won't work with a deployed application, since it won't have access to our machine. In this case, we need to do slightly more configuration on Heroku to deploy our app.
In this guide, we'll walk through the steps we need to take to deploy an application backed by a SQL database to Heroku.
Before you get deploy your application to Heroku, you'll need to enable the JawsDB Add-On.
JawsDB Add-On is a Heroku add-on that provides a fully functional MySQL database server for use with your Heroku application. For our purposes, you’ll use the free Kitefin Shared pricing plan.
Note: Although the Kitefin Shared plan is free, you’ll need to provide a credit card in the billing section of your Heroku account. Rest assured that you won’t be charged anything as long as you choose the free Kitefin Shared plan, but you’ll still need to provide your credit card information.
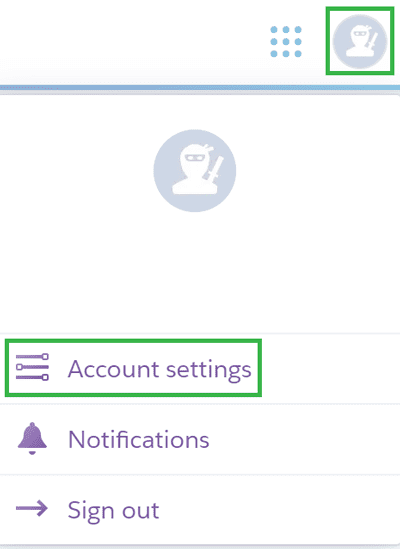
To enable the JawsDB Add-On, log into your Heroku account. Once you have logged in, click on the profile icon in the upper right-hand corner of the page. This will open a drop-down menu. Click on “Account settings,” as shown in the following image:

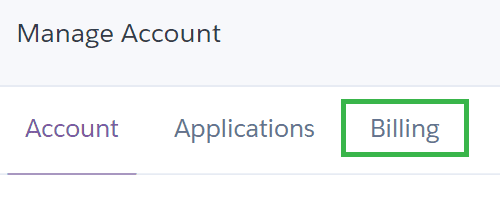
This will take you to a page where you can manage your account. In the left-hand navigation, click on Billing, shown in the following image:

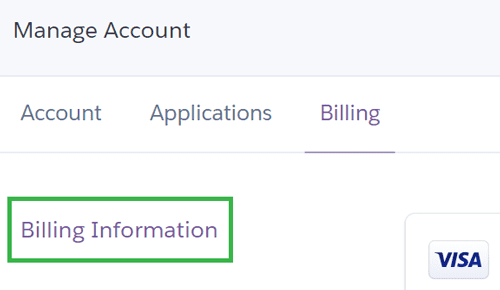
Once you have reached the Billing page, enter your credit card information in the section named Billing Information, like in the following image:

And that’s it! You’ll install the JawsDB add-on to use with your application in the next section.
Before you deploy your app, you'll want to make sure the main branch has all of your changes.
Pro Tip: You don't always have to push to Heroku from the
mainbranch. Feature branches can be deployed with the following command:git push heroku <feature-branch>:mainThis is helpful if you're only using the Heroku URL for testing, but you wouldn't want to do this if the app is already in production.
To get started with Heroku, simply run the following commands from within your project directory:
heroku creategit push heroku main
The next step in making your app Heroku-compatible is adding the following line in server.js:
const PORT = process.env.PORT || 3001;
This uses Heroku's process.env.PORT value when deployed and 3001 when run locally. Having a dynamic port number is important, because it's very unlikely that the port number you hardcode (3001, for example) would be the port Heroku runs your app on in production.
There's another hardcoded value in the app that Heroku won't appreciate. Open your config/connection.js file and review the current setup, as shown in the settings below:
const sequelize = new Sequelize(process.env.DB_NAME,process.env.DB_USER,process.env.DB_PW,{host: 'localhost',dialect: 'mysql',port: 3306,},);
As of now, this will only work with your local database. Could you continue using your local database even on Heroku? Well, yes, but then you'd have to make your ports public (probably not a good idea) and always leave your computer on.
Instead, we should make a new remote database on Heroku and tell the app to connect to that one when deployed but still use the local database when running locally. Fortunately, Heroku comes with a variety of add-ons that make setting up a remote database relatively easy. The one we'll use for MySQL is called JawsDB.
Important: When using Heroku add-ons, Heroku will require you to put a credit card on file. Heroku will not charge you, though, unless you specifically upgrade to one of their paid services.
Open the Heroku Dashboard in your browser and navigate to the app that you created for this project.
Pro Tip: If you already have several projects on Heroku, it might be confusing to tell which one is the current one, since all the projects are named with auto-generated pseudonyms.
To see which name Heroku is using for your application, run the following code in your terminal:
git remote -vIt will then report something like this:
heroku https://git.heroku.com/sacred-cow-72631.git (fetch)heroku https://git.heroku.com/sacred-cow-72631.git (push)origin git@github.com:myGitHub/just-tech-news.git (fetch)origin git@github.com:myGitHub/just-tech-news.git (push)This will mean that sacred-cow-72631 is the app's name at Heroku.
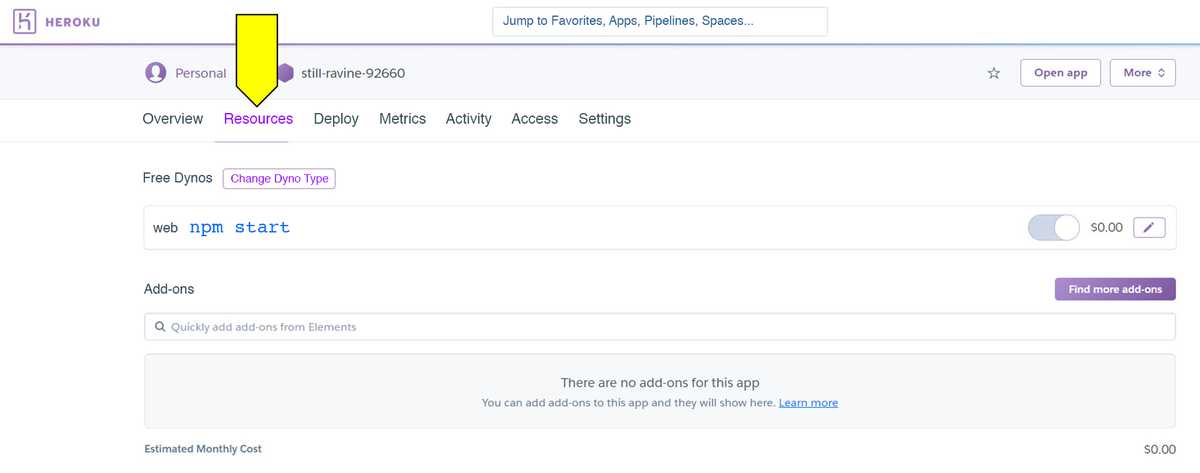
Once there, click on the Resources tab, as shown in the following image:

Underneath Add-ons, search for "JawsDB MySQL" per the following image:

Heroku will confirm that you want to add JawsDB to your app. Click the Provision button, and you're done! You now have access to a remote MySQL database hosted by Heroku.
Return to your codebase and open the connection.js file again. Update the connection logic to look like the following code:
let sequelize;if (process.env.JAWSDB_URL) {sequelize = new Sequelize(process.env.JAWSDB_URL);} else {sequelize = new Sequelize(process.env.DB_NAME,process.env.DB_USER,process.env.DB_PW,{host: 'localhost',dialect: 'mysql',port: 3306,},);}
When the app is deployed, it will have access to Heroku's process.env.JAWSDB_URL variable and use that value to connect. Otherwise, it will continue using the localhost configuration.
Let's try it out! Run the following commands from the terminal to update the app:
git add -Agit commit -m "connect to jawsdb"git push heroku main
If your app doesn't have a front end, there won't be much to see in the browser. You can still test the API endpoints with Insomnia Core, though. Simply replace http://localhost:3001 with the name of your Heroku app. For example: https://just-tech-news.herokuapp.com/api/posts.
Of course, all of your GET requests will return empty data sets, because you're connected to a brand new database. You'll need to make a few POST requests first to fill up the JawsDB database.
This page was updated 6 months ago
© 2022 edX Boot Camps LLC. Confidential and Proprietary. All Rights Reserved.
Category: heroku
Tagged under: heroku, deployment, mysql, node, sequelize, guide,
All Posts
- OpenAI Account Setup Guide
- NodeJS Installation Guide
- PostgreSQL Reference Guide
- GitHub Copilot Guide
- PostgreSQL Installation Guide
- Deploy with Render and PostgreSQL
- API Resources
- Render Deployment Guide
- Deploying a MERN Stack Application to Render
- Deploy with Render and MongoDB Atlas
- The Science and Research Behind Our Unconventional Educational Approach
- What Makes Up a Web Development Project?
- Localhost Loopback Issues Troubleshooting Guide
- Video Submission Guide
- A Growth Mindset for Life
- Web Literacy
- Developer Resources
- Introduction to Computer Structure and Organization
- MySQL Installation Guide
- HTML Cheatsheet
- Advanced Computer Skills
- Introduction to Computer Skills
- How to Use API Keys
- How to Install MongoDB
- MySQL Reference Guide
- Heroku Deployment Guide
- Getting Started with Git
- Using the GraphQL Playground in a MERN application
- Professional README Guide
- Regular Expression Tutorial
- How to Install the Heroku CLI
- How to Install NodeJS
- Deploy with Heroku and MySQL
- Deploy with Heroku and MongoDB Atlas
- Set Up MongoDB Atlas