How to Install the Heroku CLI
February 06, 2024Disponible en español
Heroku is a cloud application platform that enables developers to build, run, and operate applications entirely in the cloud. Unlike GitHub pages, which only allows you to deploy static sites with HTML pages, Heroku allows you to deploy a server.js file that will run the Node.js process. You’ll use the Heroku CLI to deploy apps to Heroku without leaving the command line.
Important You should have received an email providing access to the GitHub Student Developer Pack. This will give you $13 in free Heroku credits per month. Please ensure that you've accepted that invitation before you sign up for Heroku and install the CLI. Once you have access to the GitHub Student Developer Pack, follow the instructions below to do the following:
Sign up for a Heroku account.
Install the Heroku CLI.
Connect your Heroku account to your GitHub account so that you receive the benefits of the GitHub Student Developer Pack.
To install the Heroku CLI on your machine, follow the instructions for your operating system below. Some of the images and versions mentioned below may slightly different from the Heroku site, but the general instruction is the same.
Before you begin, sign up for a free Heroku account.
To install the Heroku CLI on Windows, download the 64-bit installer for Windows.
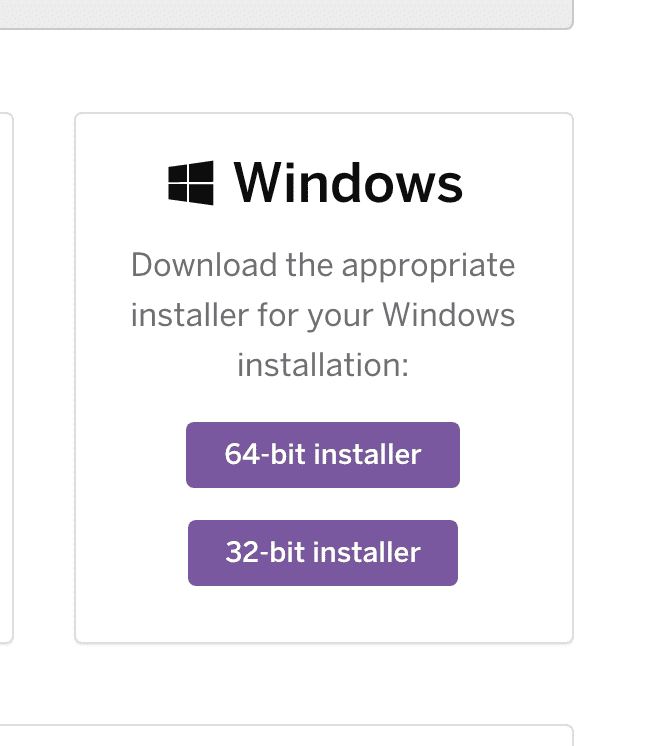
Open the installer on your machine and follow the prompts to complete the installation. Once the installation is complete, open Git Bash.
To verify that the Heroku CLI was installed, type heroku --version into the command line. You should get a message that looks like the following, but note that the number may be different depending on your version of the CLI:
heroku/7.42.6 win32-x64 node-v12.16.2
After you confirm that the Heroku CLI was installed correctly, type heroku login into the command line. You'll be prompted to enter any key to go to the web browser to complete login. The CLI will then log you in automatically.
To install the Heroku CLI on macOS, first ensure that you have Homebrew installed on your machine.
Once you've confirmed that you have Homebrew installed, open your Terminal and enter the following command:
brew tap heroku/brew && brew install heroku
To verify that the Heroku CLI was installed, type heroku --version into the command line. You should get a message that looks like the following, but note that the number may be different depending on your version of the CLI:
heroku/7.42.5 darwin-x64 node-v12.16.2
After you confirm that the Heroku CLI was installed correctly, type heroku login into the command line. You'll be prompted to enter any key to go to the web browser to complete login. The CLI will then log you in automatically.
One of the benefits you receive in this boot camp is 12 months of access to the GitHub Student Developer Pack. By now, you should have received an email with a link providing access to the Student Developer Pack. This benefit includes $13 in free Heroku credits per month, which will allow you to deploy server-side applications over the rest of the course.
Important Ensure that you've accepted the GitHub Student Developer Pack invitation before proceeding.
After you've accepted the GitHub Student Developer Pack invitation, make sure that you're signed in to your GitHub account.
Next, connect your GitHub account on Heroku.
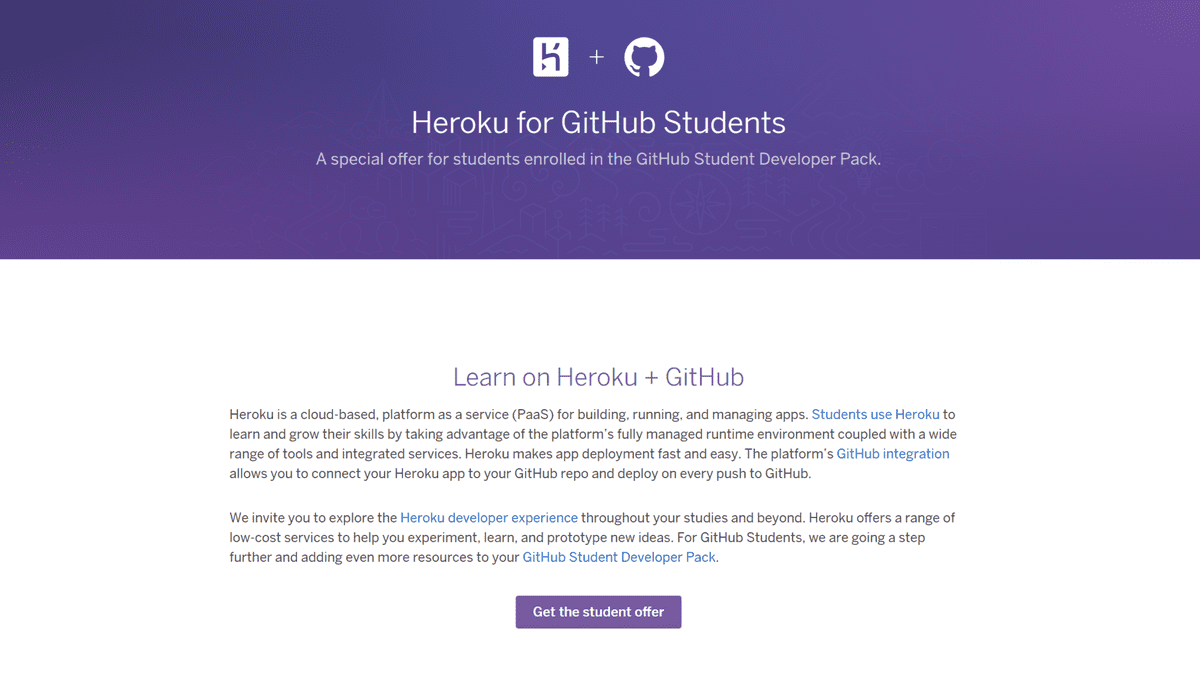
This will take you to a page called "Heroku for GitHub Students." Scroll down and click on the button with the text "Get the student offer," as shown in the following image:
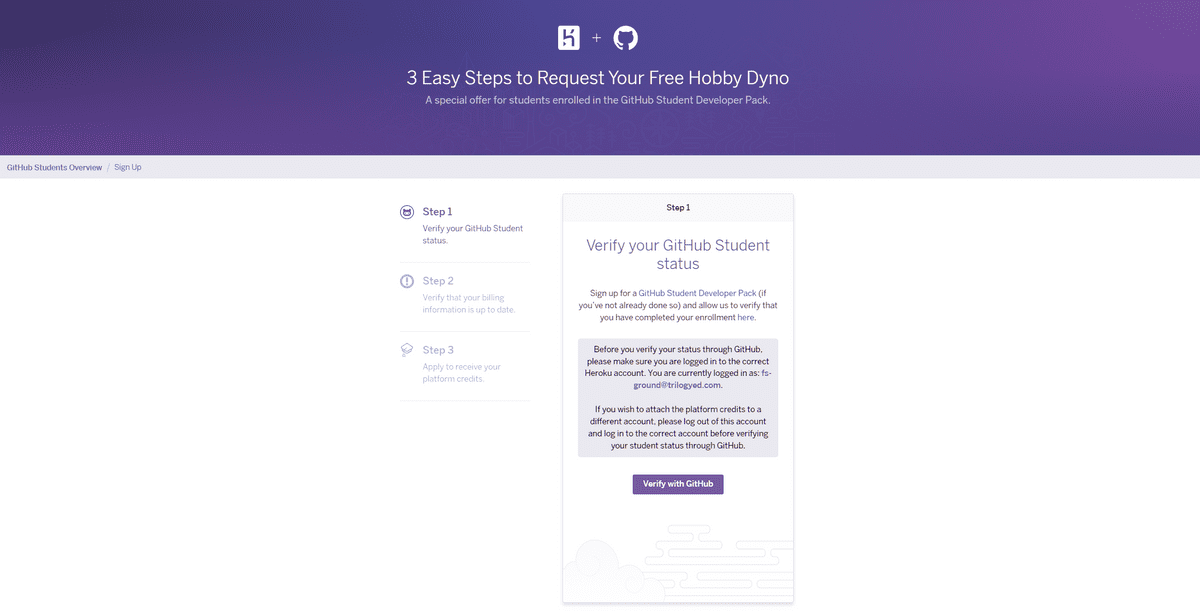
You'll then need to log into your Heroku account, which will take you to a page called "3 Easy Steps to Request Your Free Hobby Dyno." To complete step one, simply click on the button with the text "Verify with GitHub," as shown in the following image:
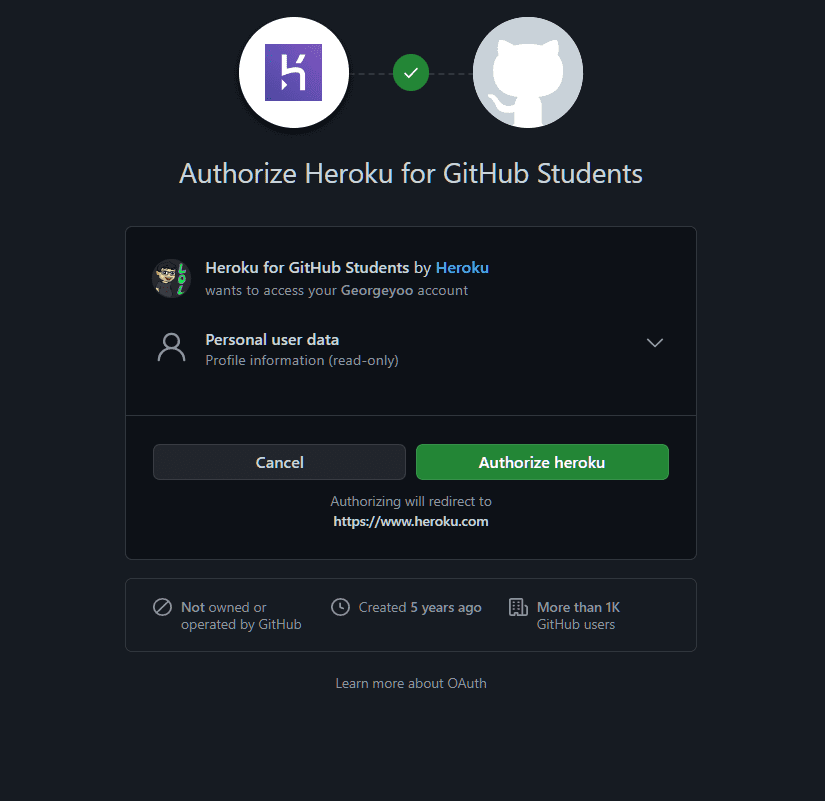
You'll be redirected to GitHub with the prompt "Authorize Heroku for GitHub Students." Click the green "Authorize heroku" button to connect your GitHub account with Heroku:
With Step 1 complete, you can move on to Step 2: "Verify your Heroku billing information." You will need to provide a credit card in the billing section of your account. Rest assured that you won't be charged anything as long as you properly manage your deployed applications. We will go over how to spin down deployed applications in subsequent blogs to both help avoid incurring charges as well as preserve your application code.
Don't click the purple "Verify my billing information" button yet! Click the link "Add a credit or debit card to your account now..." and a new tab will open that will display account's billing page:
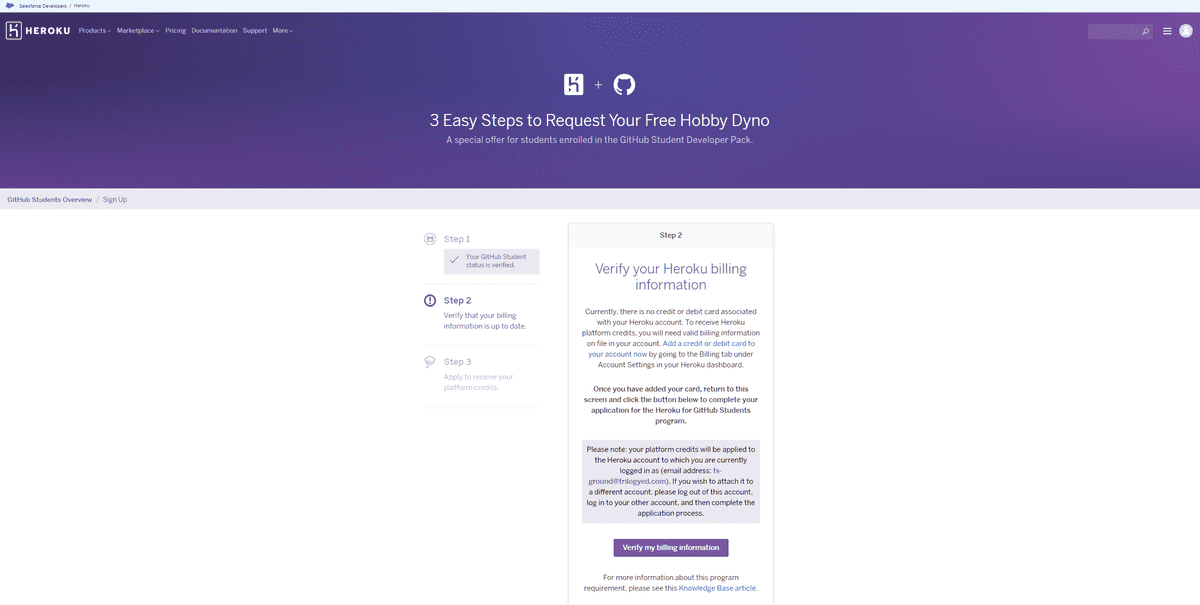
Within the "Manage Account" page on Heroku, click "Add a credit card" and enter your full payment information:

Once you have saved your payment information, you can close the current tab and click the purple "Verify my billing information" button of Step 2:

If your payment information is correct, you'll be taken to Step 3, titled "Apply for the Heroku for GitHub Students Offer". Enter your first name, last name, and university.
Note Be sure to enter "EdX Boot Camps" as your University.
Click on the "I'm not a robot" checkbox to be presented with the captcha verification and follow the instructions to complete it; then, click the "Send" button:
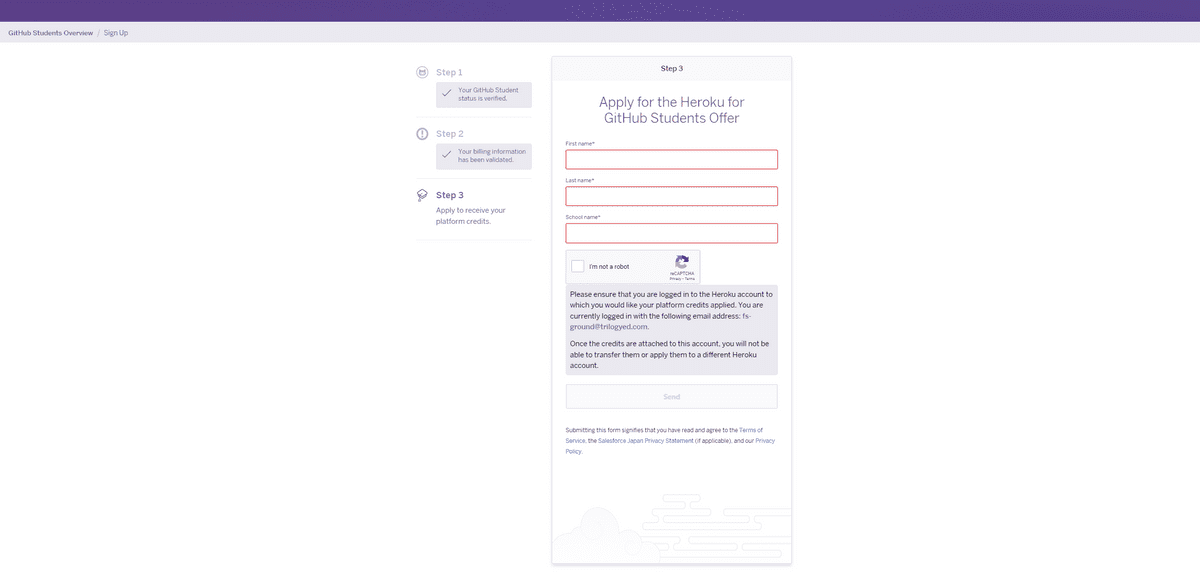
Finally, you will be presented with a page with the title "Terms: Heroku for GitHub Students Offer." Simply click the "Agree" button:

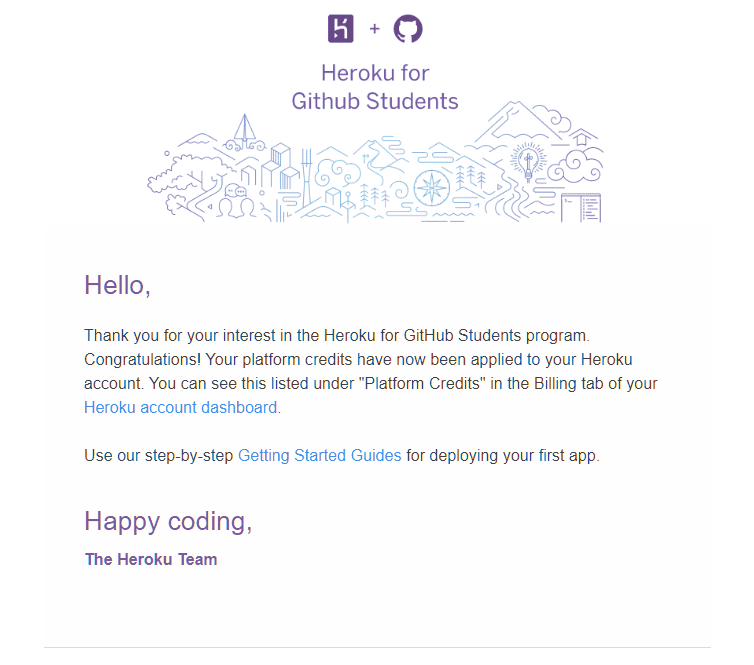
You'll then be taken back to the "3 Easy Steps to Request Your Free Hobby Dyno" with all three steps checked. Now, just wait up to 24 hours for an email from Heroku confirming that your platform credits have been applied to your Heroku account:
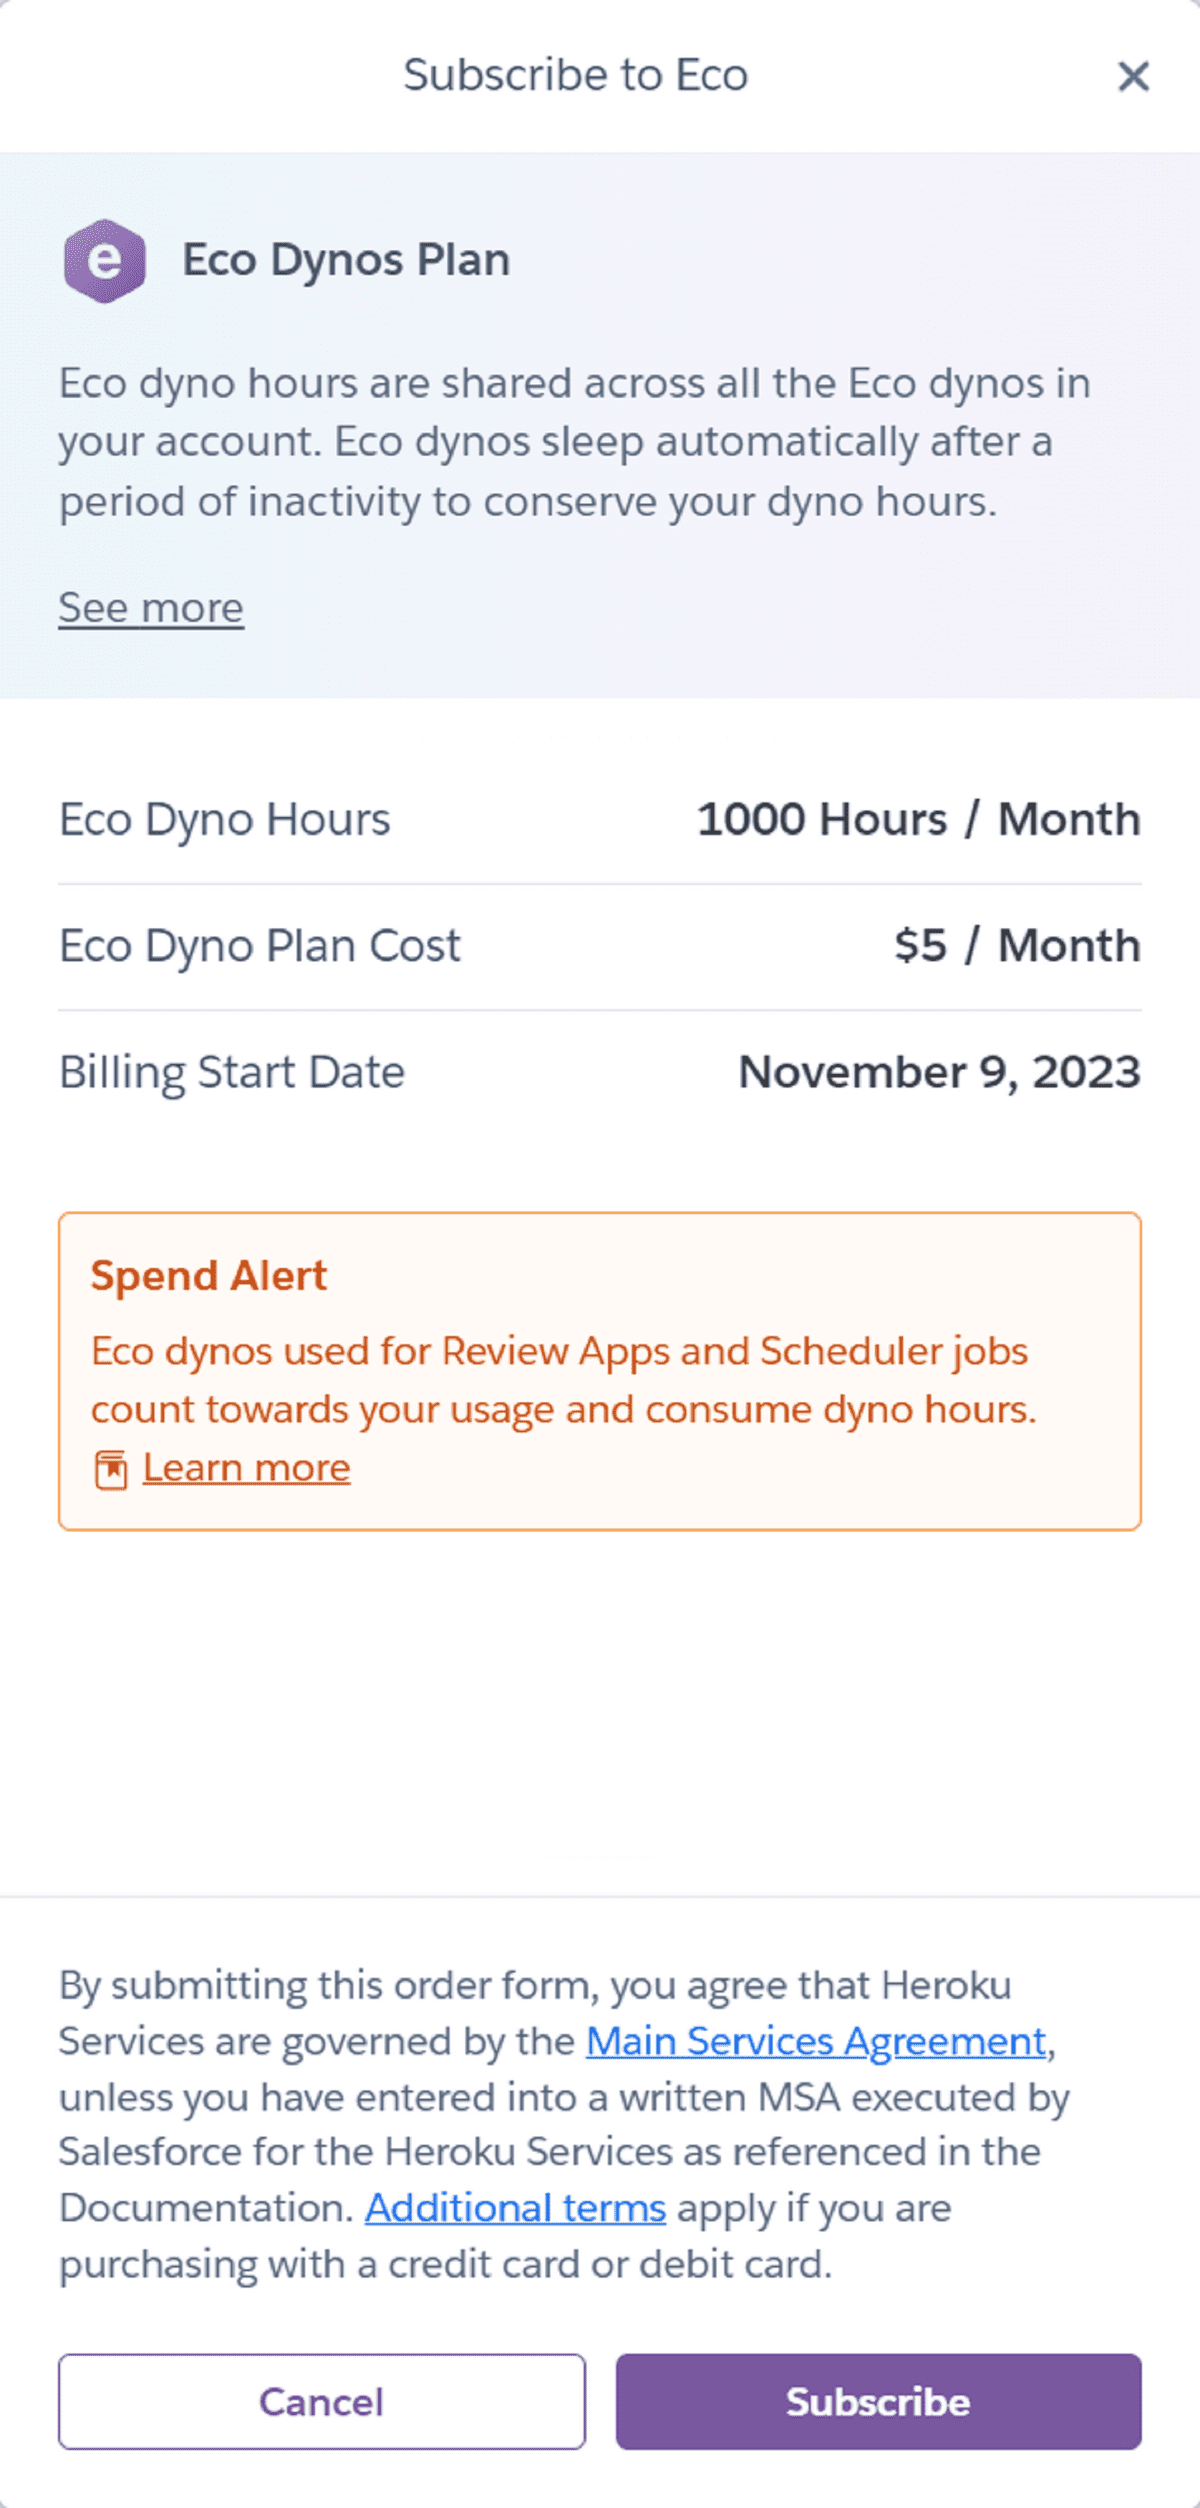
As a last step, within the "Manage Account" page on Heroku, select "Billing." There, you will see an option to "Subscribe to the Eco Dynos Plan."

This plan will provide you with 1,000 dyno hours for $5 per month, which should keep you well within your GitHub Student Developer Pack $13 credit amount. Additionally, these dynos will automatically spin down when idle.
Confirm your subscription, then proceed to code and deploy!
This page was updated 6 months ago
© 2022 edX Boot Camps LLC. Confidential and Proprietary. All Rights Reserved.
Category: heroku
Tagged under: heroku, heroku cli, installation, guide,
All Posts
- OpenAI Account Setup Guide
- NodeJS Installation Guide
- PostgreSQL Reference Guide
- GitHub Copilot Guide
- PostgreSQL Installation Guide
- Deploy with Render and PostgreSQL
- API Resources
- Render Deployment Guide
- Deploying a MERN Stack Application to Render
- Deploy with Render and MongoDB Atlas
- The Science and Research Behind Our Unconventional Educational Approach
- What Makes Up a Web Development Project?
- Localhost Loopback Issues Troubleshooting Guide
- Video Submission Guide
- A Growth Mindset for Life
- Web Literacy
- Developer Resources
- Introduction to Computer Structure and Organization
- MySQL Installation Guide
- HTML Cheatsheet
- Advanced Computer Skills
- Introduction to Computer Skills
- How to Use API Keys
- How to Install MongoDB
- MySQL Reference Guide
- Heroku Deployment Guide
- Getting Started with Git
- Using the GraphQL Playground in a MERN application
- Professional README Guide
- Regular Expression Tutorial
- How to Install the Heroku CLI
- How to Install NodeJS
- Deploy with Heroku and MySQL
- Deploy with Heroku and MongoDB Atlas
- Set Up MongoDB Atlas