Heroku Deployment Guide
February 06, 2024Disponible en español
This guide reviews the steps to deploy an application to Heroku using the Heroku CLI.
If you don't have a Heroku account, or if you have yet to install the Heroku CLI, see How to Install the Heroku CLI before you proceed.
You've likely already deployed a front-end application to a platform like GitHub Pages. But to deploy an application with a back end, you'll need a platform like Heroku that can handle the additional configuration—so that your app can accept incoming connections from the internet.
To start, make sure that your project is initialized as a Git repository. You can check this by running the following command at the root of your project:
git status
If you encounter an error, that means that your project isn't yet a Git repository. You can initialize the repository by running the following command:
git init
Applications that feature an Express.js back end can use Heroku's PORT environment variable. To set this up, create a port variable with a value of process.env.PORT. You can also add a default value for local instances of your server by using the || syntax, as show in the following example:
const port = process.env.PORT || 3001
Now that we've created the repository and configured the server, we can create an app on Heroku without even opening the browser.
The Heroku CLI is a helpful utility for creating and managing your remotely hosted web applications. You can use it to easily create a Heroku app once you've configured the repository that you want to deploy.
Create a new Heroku app by running the following command in the root of your project:
heroku create
Note The Heroku CLI will randomly generate an app name, but you can specify a name using the syntax
heroku create <app name>.
Once you've created the app, you can run git remote -v to verify that the Heroku remote URL was added by the Heroku CLI—as shown in the following example:
git remote -vheroku https://git.heroku.com/<heroku-app-name>.git (fetch)heroku https://git.heroku.com/<heroku-app-name>.git (push)
The remote URL gets added automatically to your Git repository without requiring any extra commands—pretty neat! Now you can prepare for deployment.
Okay, it's time to actually deploy your application! Deployment allows other developers to give you more detailed feedback, and it allows you to show off the latest features in your app.
First you'll want to add and commit all your project files, then push to Heroku, as follows:
git add -Agit commit -m "Pushing to Heroku"git push heroku main
Confirm that the application was deployed successfully by visiting the application URL provided in the terminal. Sometimes the output will say that the build was successful, but you should still open your application in the browser to verify, as shown in the following example:
remote: -----> Build succeeded!remote: -----> Discovering process typesremote: Procfile declares types -> (none)remote: Default types for buildpack -> webremote:remote: -----> Compressing...remote: Done: 33.8Mremote: -----> Launching...remote: Released v9remote: https://lit-retreat-65972.herokuapp.com/ deployed to Heroku
Note You can also run
heroku opento automatically open the webpage.
Sometimes errors in your application won't be readily apparent from the terminal. In this case, you can view the Heroku logs by running the following command:
heroku logs --tail
Note Exit the log output by pressing Ctrl+C.
You can use the following command to access the command line for the remote container running your application:
heroku run bash
Congratulations on deploying your first app with a server to Heroku! The link will be accessible as long as your app exists on Heroku. That said, Heroku spins up a new container to run your app after an extended period of inactivity, so be patient if it takes longer than usual to load.
If you encounter issues, remember that deployment rarely occurs without a hitch. Deciphering errors and reading documentation are key parts of the deployment process.
Note: If you subscribed to the Eco Dynos subscription plan upon account setup, the following steps are not required.
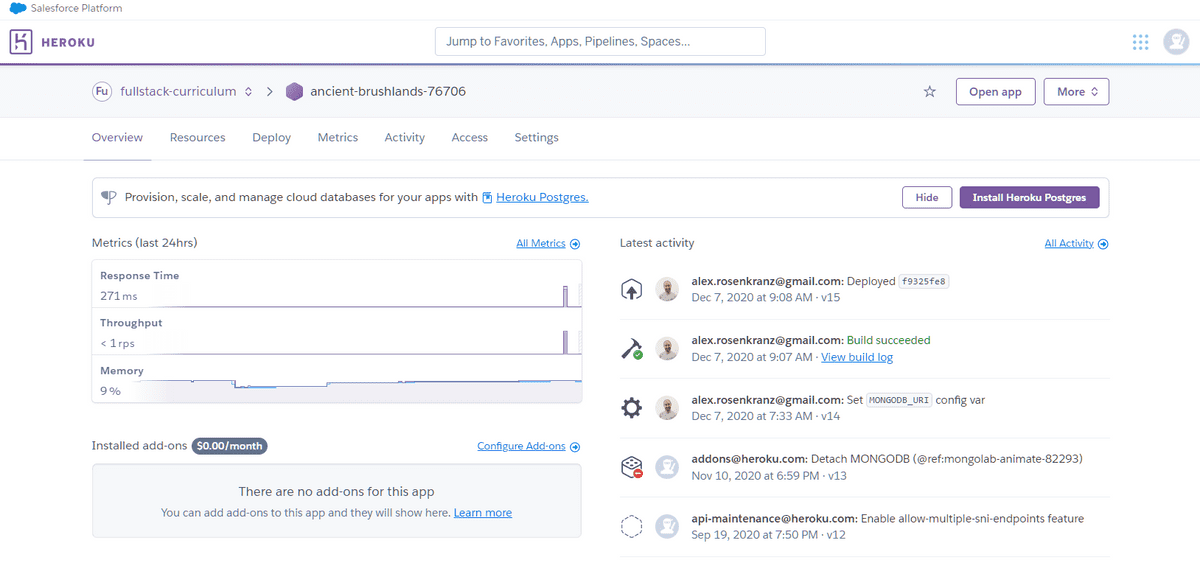
Via your application's Resources page, you can set your Dynos options per application. Begin on your Heroku Dashboard, and select the desired application.

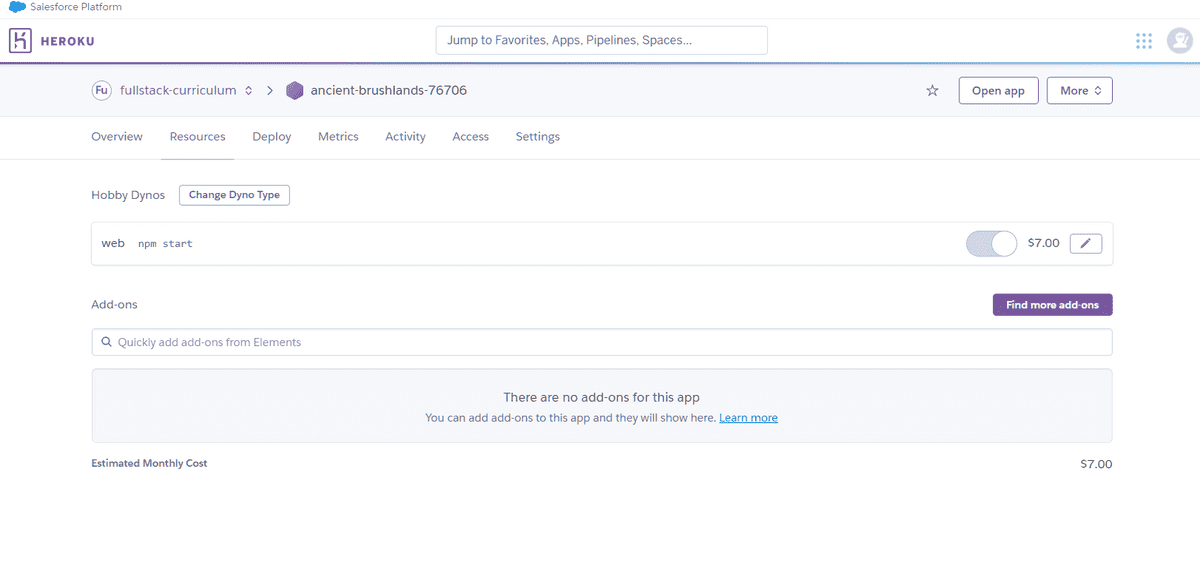
By default, you'll be taken to the deployed application's "Overview" tab. Click on the "Resources" tab to be taken to the resources section of your application, as shown in the following image:

From this view, you should be able to select the "Subscribe to Eco" option.

This plan will provide you with 1,000 dyno hours for $5 per month, which should keep you well within your GitHub Student Developer Pack $13 credit amount. Additionally, these dynos will automatically spin down when idle.
Note: If you are using a Heroku Eco Dynos subscription plan, the following steps are optional. With this subscription model, your applications will automatically spin down after 1,000 hours.
To spin down an application deployed on Heroku, it's as simple as navigating to the Heroku dashboard and clicking the application you wish to spin down:

By default you'll be taken to the deployed application's "Overview" tab. Click on the "Resources" tab to be taken to the resources section of your application, as shown in the following image:

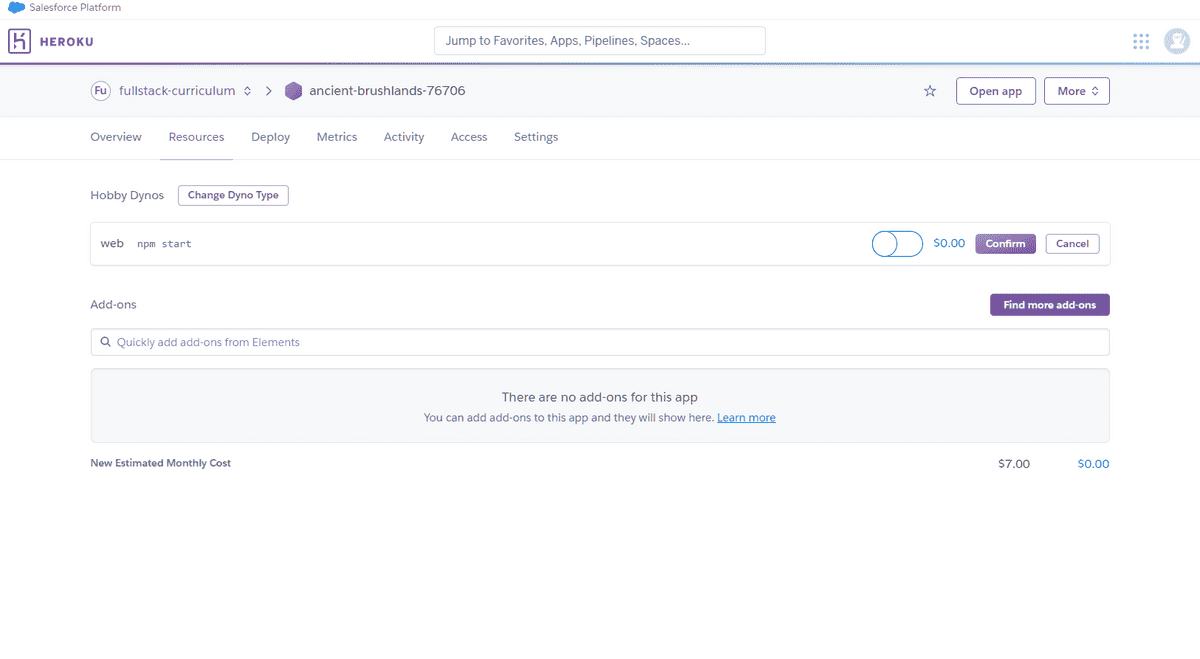
To spin down the deployed application, look under the "Hobby Dynos" section. Then, click the button with the pencil icon, click the toggle so that it is set to the left, and click the "Confirm" button, as shown in the following image:

Now your application is spun down and you won't incur any additional charges for this application.
Heroku offers numerous helpful resources that you can reference throughout this project. You might also find some other features of Heroku to use for future projects! Visit the following links to supplement this guide:
This page was updated 6 months ago
© 2022 edX Boot Camps LLC. Confidential and Proprietary. All Rights Reserved.
Category: heroku
Tagged under: heroku, deployment, guide,
All Posts
- OpenAI Account Setup Guide
- NodeJS Installation Guide
- PostgreSQL Reference Guide
- GitHub Copilot Guide
- PostgreSQL Installation Guide
- Deploy with Render and PostgreSQL
- API Resources
- Render Deployment Guide
- Deploying a MERN Stack Application to Render
- Deploy with Render and MongoDB Atlas
- The Science and Research Behind Our Unconventional Educational Approach
- What Makes Up a Web Development Project?
- Localhost Loopback Issues Troubleshooting Guide
- Video Submission Guide
- A Growth Mindset for Life
- Web Literacy
- Developer Resources
- Introduction to Computer Structure and Organization
- MySQL Installation Guide
- HTML Cheatsheet
- Advanced Computer Skills
- Introduction to Computer Skills
- How to Use API Keys
- How to Install MongoDB
- MySQL Reference Guide
- Heroku Deployment Guide
- Getting Started with Git
- Using the GraphQL Playground in a MERN application
- Professional README Guide
- Regular Expression Tutorial
- How to Install the Heroku CLI
- How to Install NodeJS
- Deploy with Heroku and MySQL
- Deploy with Heroku and MongoDB Atlas
- Set Up MongoDB Atlas